HOW TO CLEAN
and PRESS COMIC BOOKS

WHAT IS COMIC
BOOK PRESSING?
Comic book pressing is the process of flattening out a comic
book that has been wrinkled or damaged. Comics can get bent
during shipping or have creaselines from heavy reading. Good
news: Comic Books can be pressed using a t-shirt heatpress
machine, a book press, a stack of short boxes, or anything
heavy and flat. The idea is simple: to smooth out the waves
and bumps on the cover of a comic book. This makes the overall
grade and eye appeal of the book increase considerably. Comic
book pressing is not restoration, more like comic book conservation.
The difference can sometimes mean thousands of dollars when
discussing high dollar key comic books. Do NOT press
a comic book with an iron.
HOW LONG DOES
IT TAKE TO LEARN?
Every person is different. Do you have the ability to troubleshoot?
Life experiences, patience thresholds, busy schedules, attention
to detail, and climate can depend on the speed of your learning
process. For the average person, it will take a minimum of
2 years to fully grasp all aspects of comic book cleaning
and pressing. There are varying degrees of learning the different
eras, thickness of books, spine bindings, and paper quality.
Experience, time, and patience all play an important factor
in this experience. As with anything else in life, it all
will depend on how much time you put into learning this procedure.
Over time, you will continue to learn new tricks, and develop
your own favorite methods and shortcuts as well.
SHOPPING CHECKLIST
For this guide, you will need basic comic book pressing
equipment that can be purchased online. Please
refer to our product links page for recommended products.
THE PRESS MACHINE
There are 3 main types of machines you’ll often hear
about:
- Seal Dry Mount Press Machine, a flat-bed
style press adapted from the photography world.
- Clamshell Press Machine, which closes
like a clam to deliver simple, firm pressure. I prefer
to use the 15x15 Clamshell Press Machine, and the machine
of choice when writing my guides for comic book pressing.
- Swing Arm Press Machine, which uses
a pivoting heated plate for precise control and centralized
pressure. Swing arm machines are great for spine roll
repairs and squarebound comic books.
Each machine has its own strengths and learning
curve, and as you explore them you’ll get a sense of which
fits your setup best.
THE IMPORTANCE OF YOUR PRESSING
ROOM ENVIRONMENT
Pressing isn’t just about machines — it’s also about the space
you work in. Paper is highly sensitive to temperature and
humidity, which means the environment around your press can
directly affect your results. The ideal range for
pressing is 70–75°F (21–24°C) with a relative humidity of
40–50%. This range keeps the paper fibers flexible
enough to relax during pressing, but not so damp that they
swell or wrinkle. If your room is too humid, the paper can
absorb excess moisture, which often leads to problems like
spine waves, rippling, or even mold growth if books are left
unchecked. On the other hand, if your environment is too dry,
the paper becomes brittle and less responsive to pressing,
which increases the risk of tears, split spines, or color
rub.
MAINTAIN CONTROL OF YOUR ENVIRONMENT
To control your environment, many collectors use tools like
digital hygrometers (to measure temperature and humidity),
dehumidifiers or humidifiers (to stabilize the air), and even
air purifiers to keep dust away from books during cleaning
and pressing. By keeping your workspace stable, you’re not
only improving your pressing success rate but also protecting
your collection from long-term environmental damage.
Environment Must-Haves for Beginners
• Digital hygrometer/thermometer
– to monitor temperature and humidity.
• Dehumidifier or humidifier
– to keep relative humidity steady around 40–50%.
• Stable room temperature (70–75°F)
– avoid hot attics, garages, or damp basements.
• Air purifier – keeps dust
and particles away from books during cleaning and pressing.
• No direct sunlight – sunlight
can cause heat fluctuations and fade inks.
• Climate consistency –
don’t move books in and out of humid vs. dry spaces during
pressing.
• Avoid “problem rooms”
– open loft areas, high foot traffic zones, kitchens, bathrooms,
and laundry rooms all cause big swings in humidity and should
never be used for pressing or storing comics.
THE ORDER OF OPERATIONS
When performing comic book cleaning and pressing,
it’s critical to follow the Order of Operations so you don’t
waste time, cause damage, or miss important details. Following
the Order of Operations isn’t just about being organized
— it’s about protecting your comics and building good habits.
Pressing is a delicate process, and every step prepares
the book for the next one. If you skip inspection, you might
waste time on a comic that’s unpressable or even damage
it further. If you clean after pressing, you risk grinding
dirt into softened paper fibers. If you forget reversion
checks or proper storage, defects may come back before grading.
Each step is like a link in a chain — when followed in order,
the chain is strong; when skipped or scrambled, the chain
breaks.
The Order of Operations
for Cleaning & Pressing Comic Books:
1. Inspection for Rejects –
Identify books that are too fragile or have too many unpressable
defects. PRO TIP! Color-breaking creases,
ink loss, or brittle paper can’t be fixed by pressing.
2. Photography (Before)
– Document the book’s condition to track progress. PRO
TIP! Take clear shots under good light; clients
appreciate strong before/after records.
3. Dry Cleaning / Stain Removal
– Remove surface dirt or light soiling before adding heat
or moisture. Follow basic free dry cleaning tips at this
guide. Warning: Never
dry clean after pressing — it may be more difficult to lift
light soiling or dirt once it’s been flattened into the
paper.
4. Humidity Tank – Relax
the paper fibers to prepare for reshaping. PRO TIP!
Keep humidity controlled (40–50%) in the press room — too
much causes waves or oversaturation.
5. Dent Removal – Address
stubborn divots, impressions, or spine dents while the paper
is malleable from the humidification step. PRO TIP!
Use tools like a steam gun, steel ball bearing, and a tack
iron for targeted dent removal.
6. Pressing – Apply controlled
heat and pressure to flatten defects. Warning:
Press at safe temperatures (around 130–160°F)
— overheating risks gloss bubbling, flaring, warping, fusion.
Always allow a suitable wait time of 12-24 hrs. before removing
from press machine.
7. Reversion Check – Let
the book rest for several days and monitor for defects returning.
PRO TIP! Store in bag/board flat for 2–5
days; unstable climates cause reversion.
8. Photography (After)
– Record the results for comparison and grading prep. PRO
TIP! Side-by-side before/after photos prove your
work and protect against disputes.
9. Proper Storage – Bag,
board, and keep the book in a stable environment.
Warning: Avoid basements, attics,
or kitchens — heat and humidity swings cause reversion.
10. Shipping / Grading
– Send the book safely once fully settled. PRO TIP!
Use sturdy Gemini mailers or CGC-approved boxes
to prevent shipping dents.
PRACTICE ON
PRESSING 7 TYPES OF BOOKS
You will need to practice first on 7 basic types of comic
books to learn the process slowly. Practice on your own books
first. Practice treating each book as if it were priceless.
- Golden Age Books are brittle, require
steam or humidity, and require extra care when handling.
- Silver Age Books can also be quite
brittle, and have edgewear like crazy. Watch for rusty
staples.
- Bronze Age Books have a different
type of paper, semigloss and with inserts.
- Modern Age Books with Glossy Magazine
Paper books can have pages stick together if too hot!
Under 150F and under 10 minutes at a time. The pages will
stick together otherwise and you will create a razor blade
comic book.
- Foil books (Convention exclusives)
are more intimidating if anything. Watch your fingerprints!
Always wear gloves. Same rules apply as if it were a glossy
modern with glossy pages. Too hot and too long will ruin
the book!
- Digital Code Inserts Marvel and DC
both now have online digital code inserts found at the
last 4-6 pages. You will need to use cardstock paper to
prevent the 1″ or 2" square digital code from imprinting
on last 4-5 pages and back cover.
- Gimmick Books are books that have die
cut, embossed, glow-in-the-dark, hologram, or lenticular
covers. Embossed covers will need to be cushioned with
cardstock paper. Gimmick books can be safely pressed using
less pressure under low heat (150-155 degrees) for 5-7
minutes and left overnight in a cold press machine. Heating
up glow-in-the-dark comic book covers actually re-activate
the glow powder crystals in the paint, which effectively
make the glow effect appear brighter with bolder colors.

All of these books were pressed using methods outlined
in this guide and on my youtube channel. You too, can achieve
similar results.
STACKING LAYER RECOMMENDATIONS
Before beginning any procedures outlined on this page, make
sure that all comics have been thoroughly dry cleaned and
wiped of any fingerprints or light scratches. To learn more
about pressing and using all the stacking layers correctly,
please follow the diagram found below. You will insert paper
or cardstock layers inside the interior pages of a book
in order to push out the dents and defects during the actual
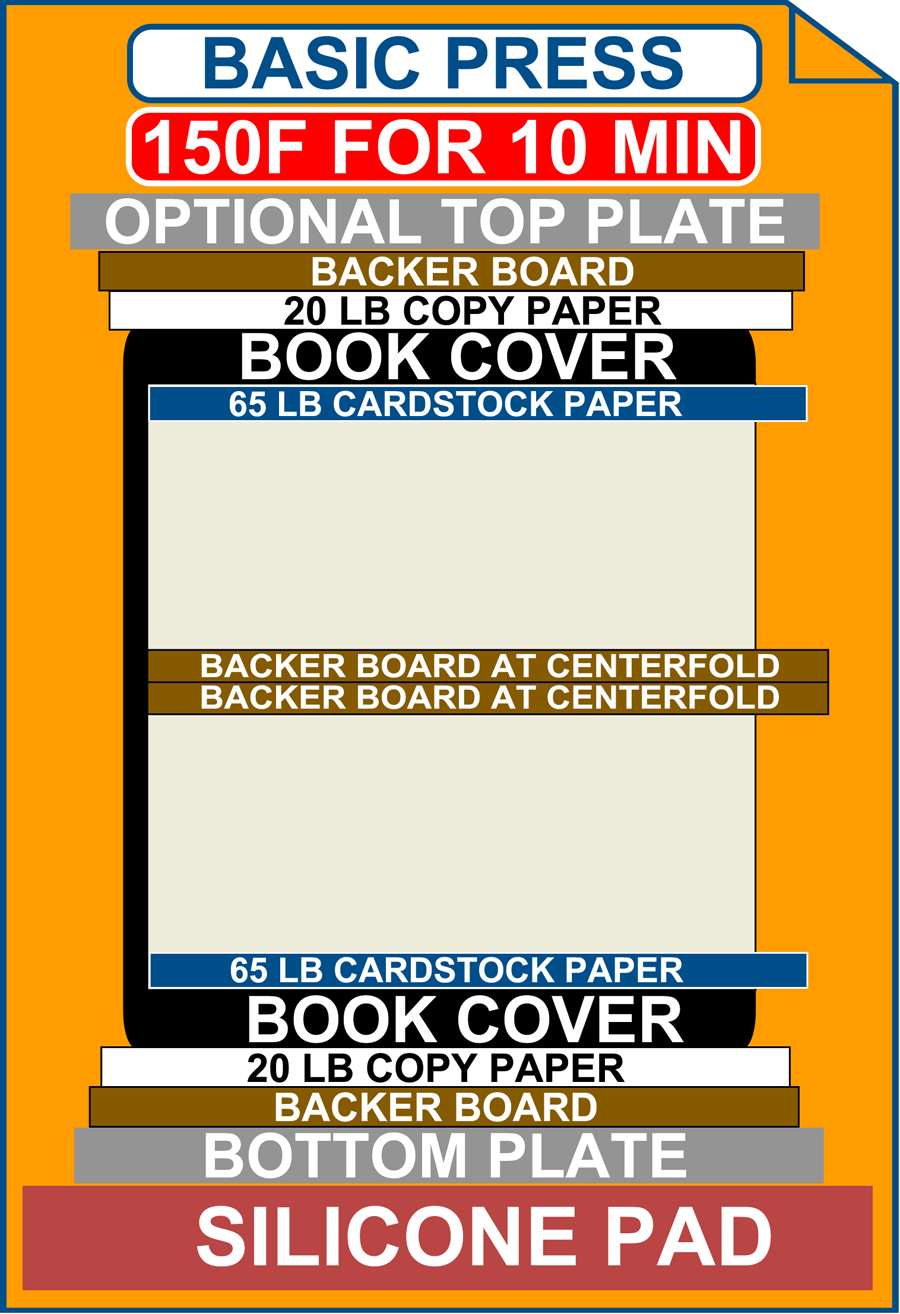
pressing procedure. The Basic Press is the core method for
all satellite formulas. Formula recommendations are altered
depending on the age of the book, type of cover, and the
type of interior paper stock. The Basic Press Formula work
well for most comics and magazines but is largely dependent
on the fragility of the cover and the spine.
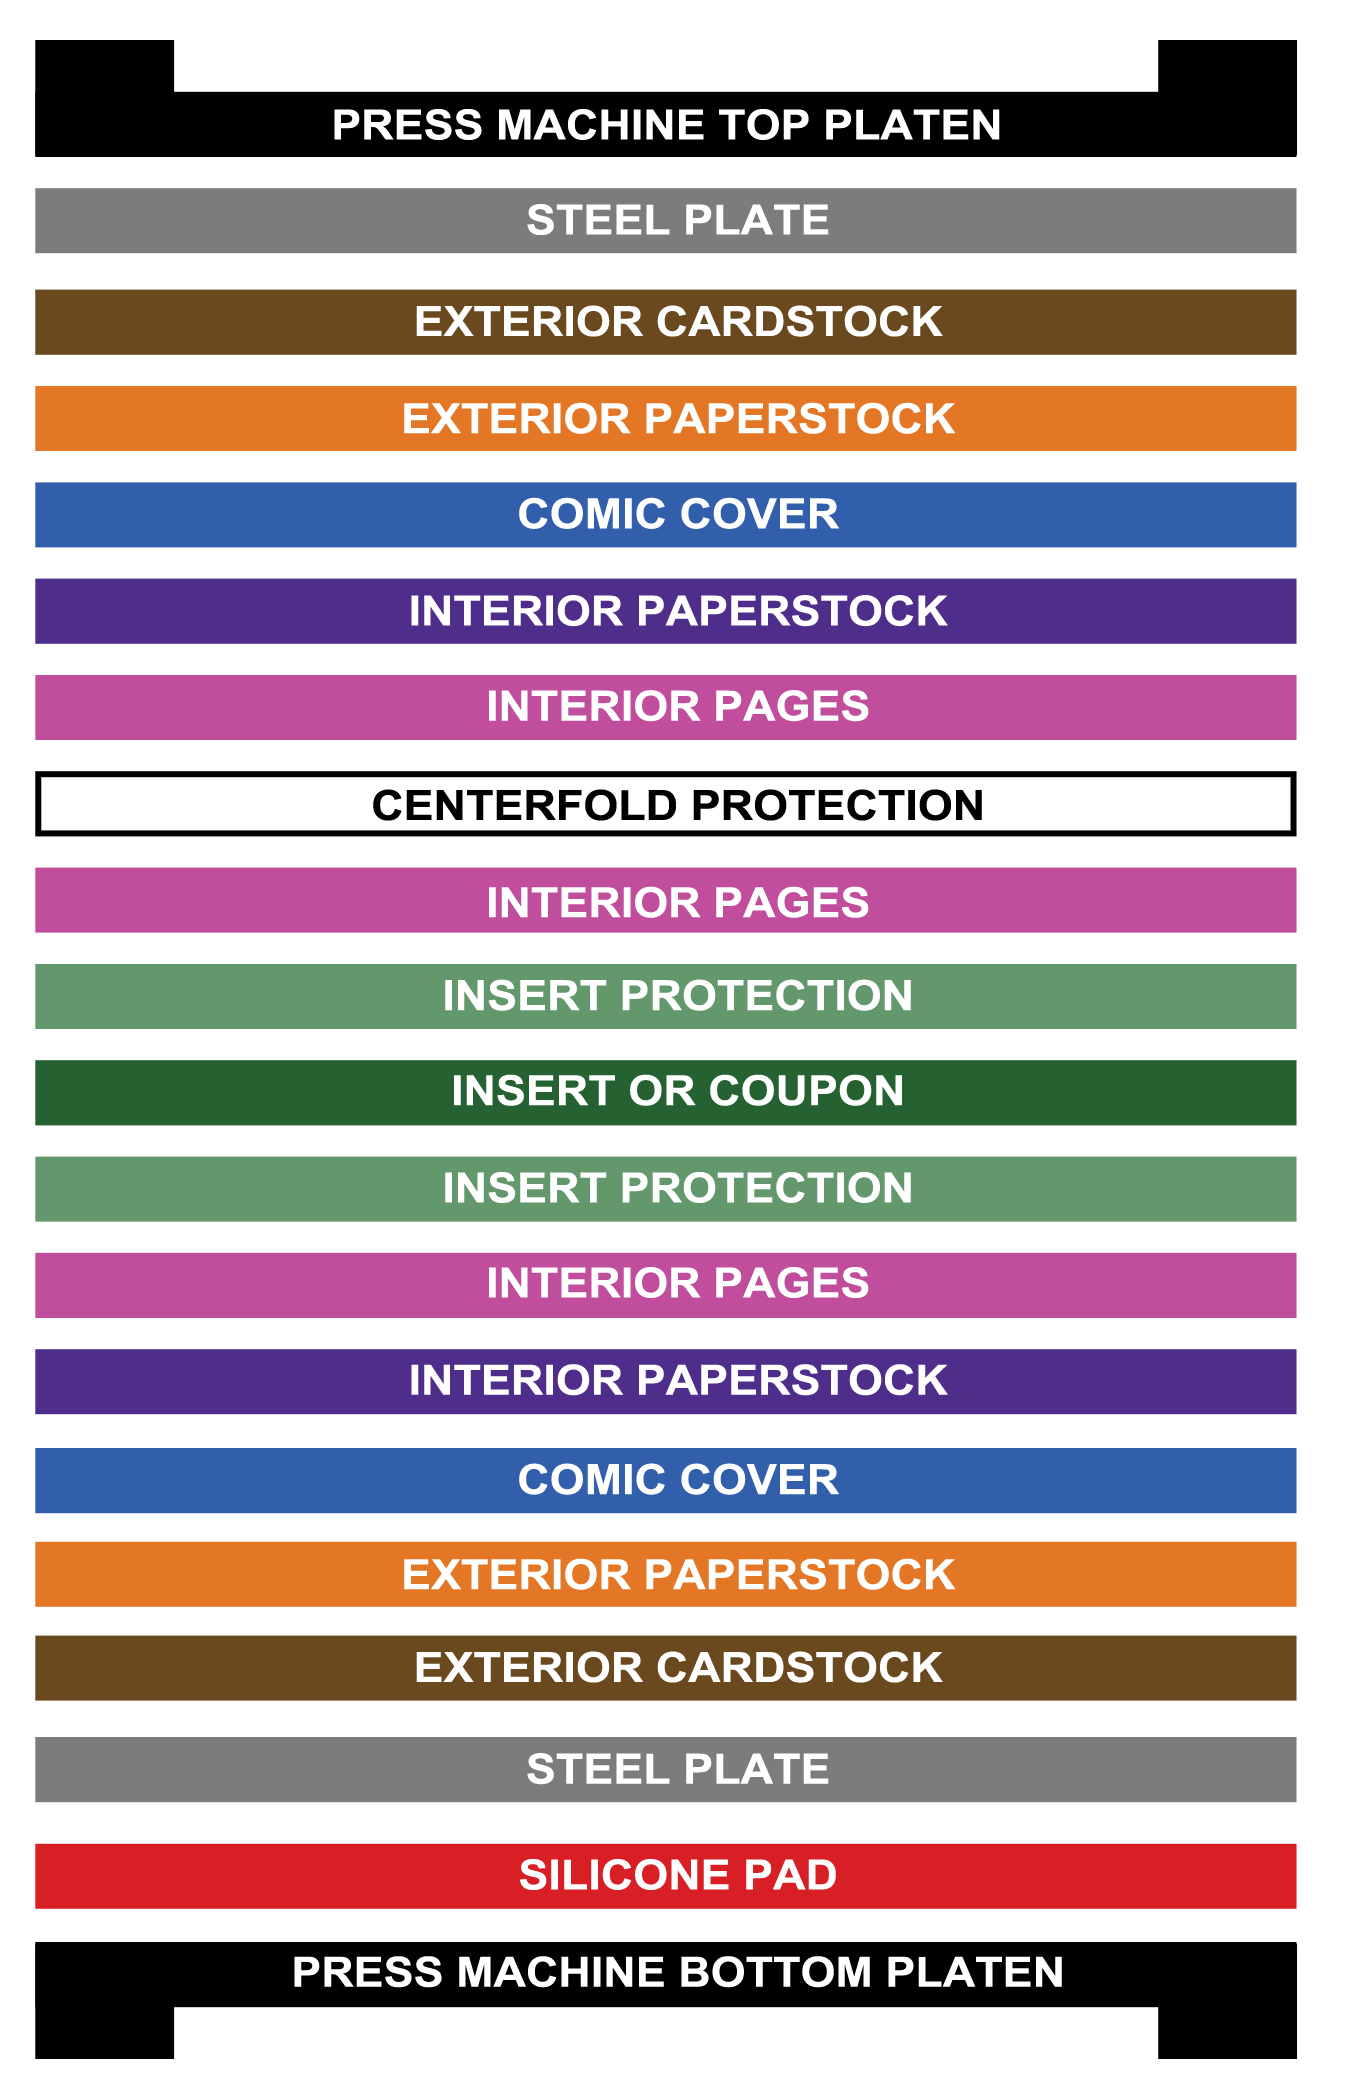
PRESSING OPTIONS
Books are typically placed in the press machine with the
most defects facing up towards the heated platen. You have
a few options for the stacking layer materials (choose one
option for each layer):
INTERIOR PAPERSTOCK (INTERIOR PAGES
OF BOOK)
• 65 LB CARDSTOCK PAPER (Primary stacking layer, underneath
covers or after pages 1 or 2)
• 110 LB CARDSTOCK PAPER (Staple protection, insert protection)
• 20 LB INKJET COPY PAPER (Secondary stacking layer, underneath
covers or after pages 1 or 2)
• SILICONE RELEASE PAPER (Dent removal, before any insert
envelope adhesive backing strip)
• NONE (Reset underhanging covers)
INSERT PROTECTION (BEFORE AND AFTER
EACH INSERT PAGE)
• 65 LB CARDSTOCK PAPER (Recommended for most inserts)
• 110 LB CARDSTOCK PAPER (Recommended for DC Comics digital
code squares)
• 20 LB INKJET COPY PAPER (5 sheets, if you do not have
65 lb cardstock paper)
CENTERFOLD PROTECTION (CENTER OF BOOK)
• MAGAZINE-SIZE BACKER BOARD (Single)
• TWO MAGAZINE-SIZED BACKER BOARDS (Double)
• FULL-BACK (Substitute for using two magazine-sized backer
boards)
• 65 LB CARDSTOCK PAPER (Prestige Format, Squarebounds,
Giant Sized glued spines)
EXTERIOR PAPER STOCK (OUTSIDE BOOK
COVERS)
• 20 LB INKJET COPY PAPER (All press stages on all comic
books and magazines)
• SILICONE RELEASE PAPER (Dent removal)
• 110 LB CARDSTOCK PAPER (Die cut covers, gimmick covers,
embossed covers)
EXTERIOR CARD STOCK (OUTSIDE BOOK COVERS)
• MAGAZINE-SIZE BACKER BOARD (Top and bottom outermost stacking
layers)
EXTERIOR RIGIDITY (OUTSIDE THE EXTERIOR
CARD STOCK LAYERS)
• STAINLESS STEEL PLATES (x2) (All press stages on all comic
books and magazines)
• ALUMINUM PLATES (x2) (All press stages on all comic books
and magazines)
• ½” or ¼” THICK FOAM BOARD (Flattening spines – cover side
down, staples up)
• THREE MAGAZINE BACKER BOARDS (x2) (Recommended if you
don’t have plates)
THE BASIC PRESS METHOD
Make sure all dry cleaning is done first.
The Basic Press Method is the basis for all satellite methods
outlined on this page. This is the full summary while performing
the Basic Press Method:
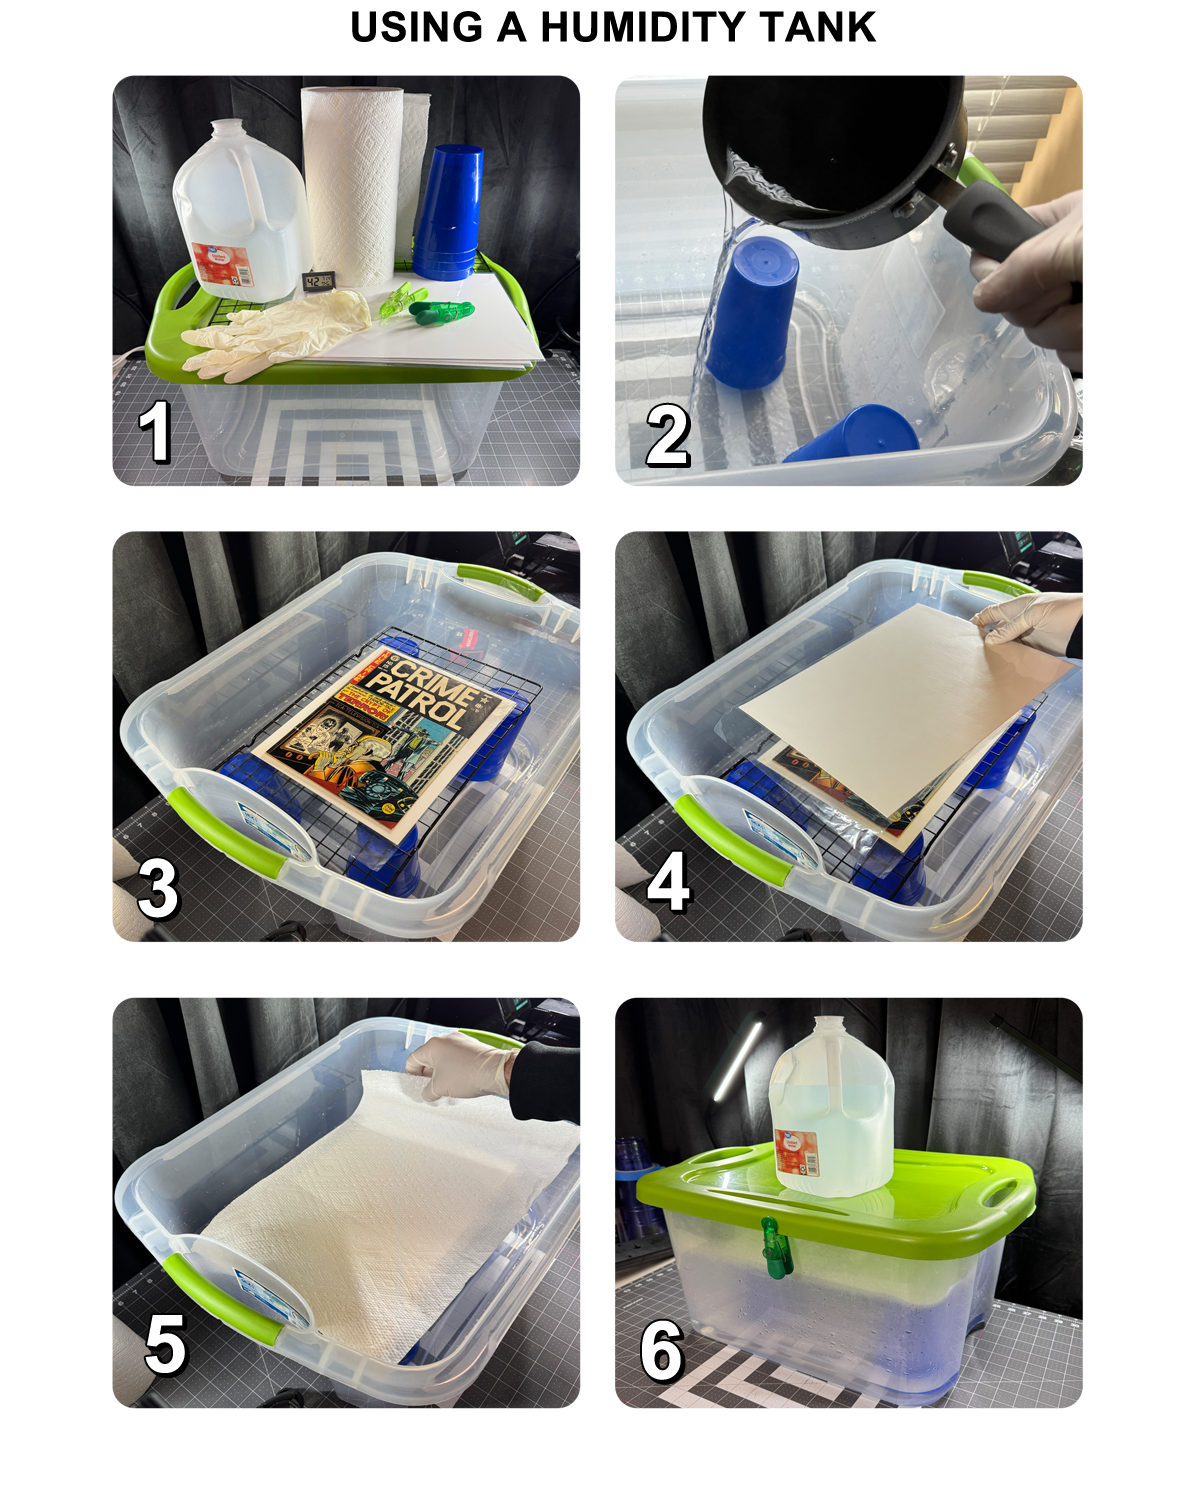
1. Place comic book on an elevated platform
in a humidity tank with a fresh gallon of
boiling water. The water line should be 1" to 2"
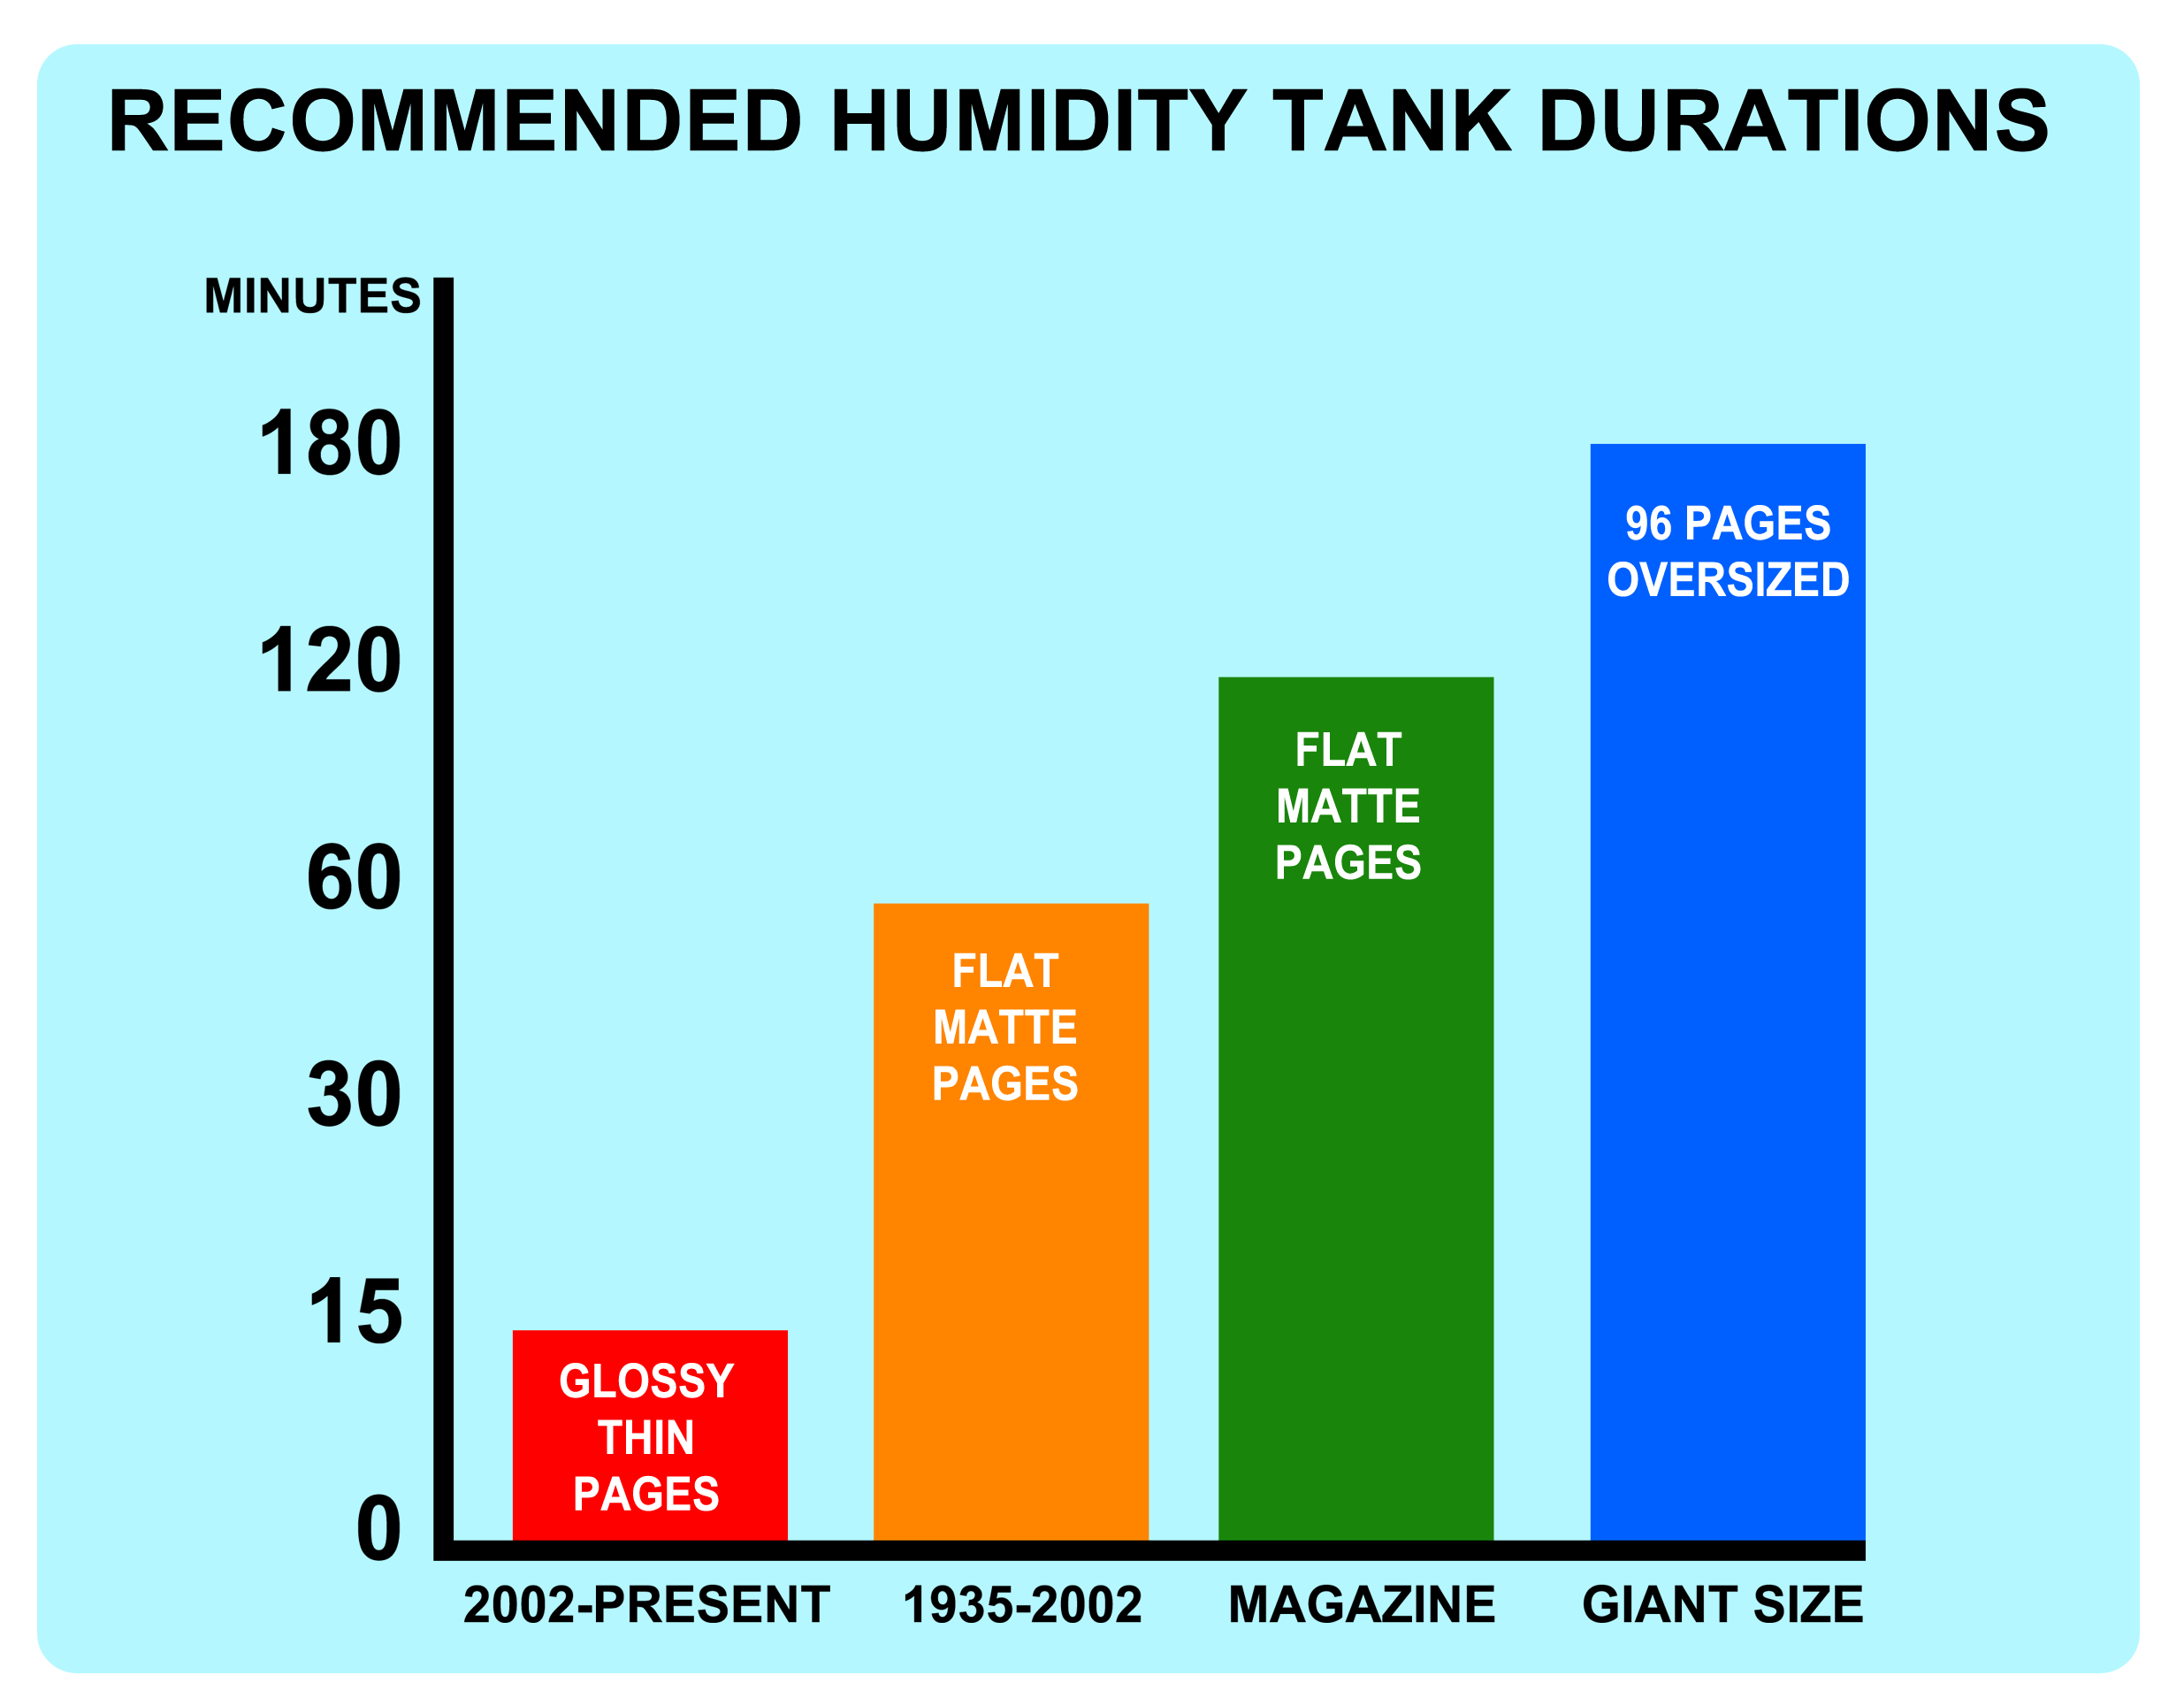
from the bottom of tank. Vintage comic books with flat matte
interior pages should be placed inside the humidity tank for
1 hour. Brand-new comic books with glossy thin interior pages
should be placed in the humidity tank for no longer than 10
to 15 minutes.

2. Perform dent removal procedures if required.
For vintage books with flat matte interior pages, apply a
damp cotton round to defect area and roll a steel ball bearing
around gently over the defect. Any book with glossy thin magazine
style interior pages should have light steam applied to the
defect area using a cut out backer board. Alternate methods
with a tack iron to apply localized heat to defect area. Proceed
to Step #3 while you are still finishing up dent removal.
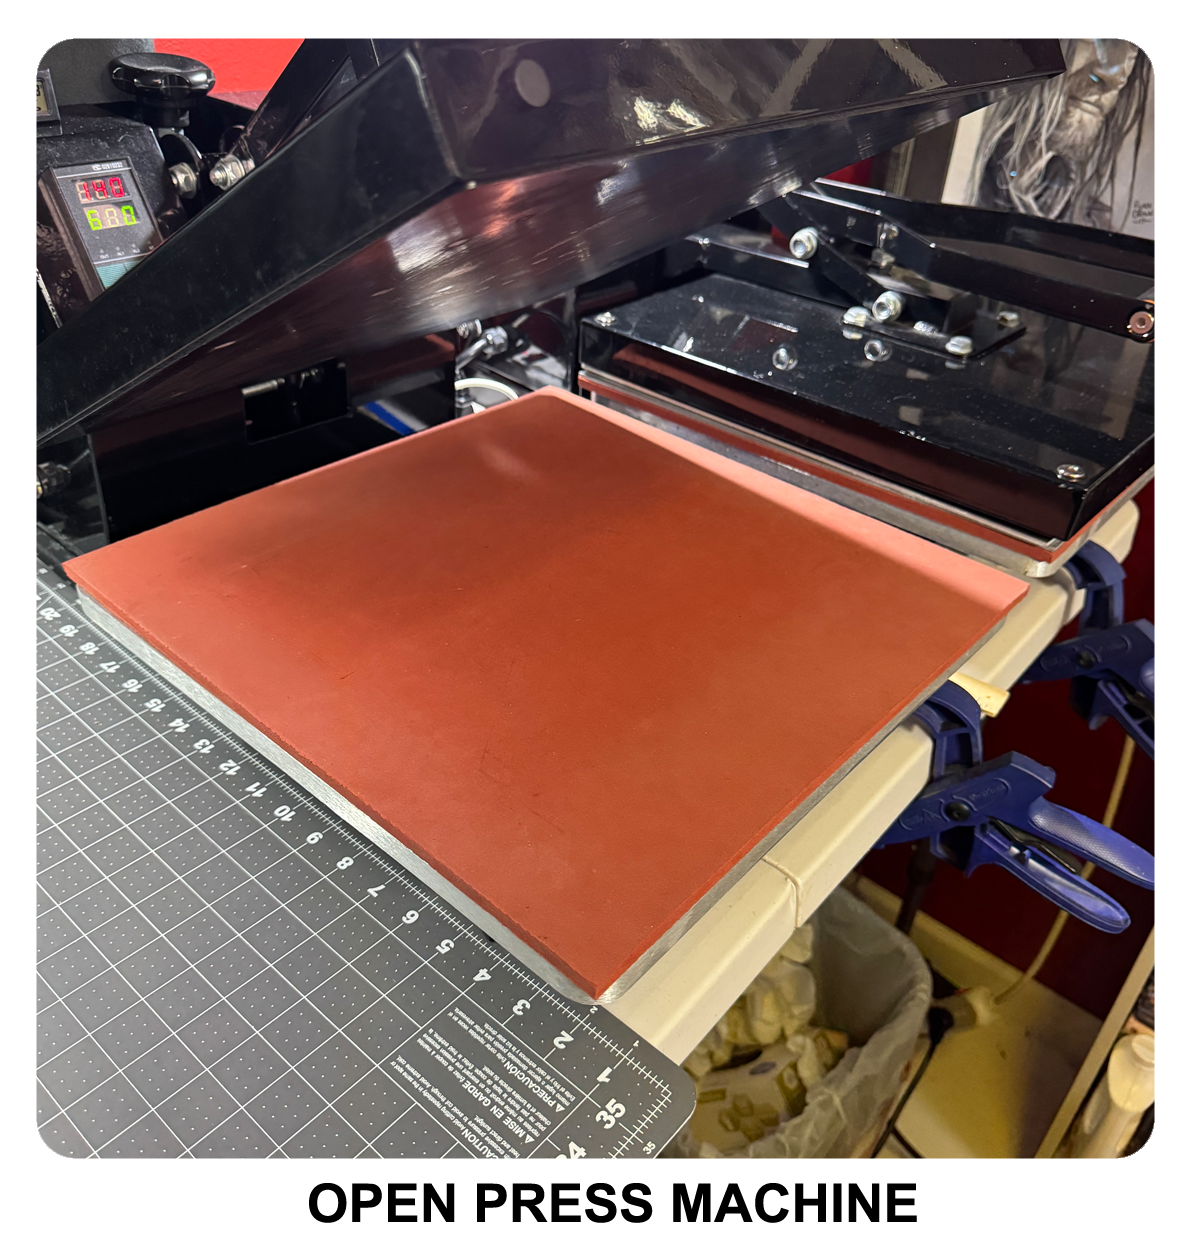
3. Open press machine. Find the power switch on your press
machine. Turn ON the
press machine.
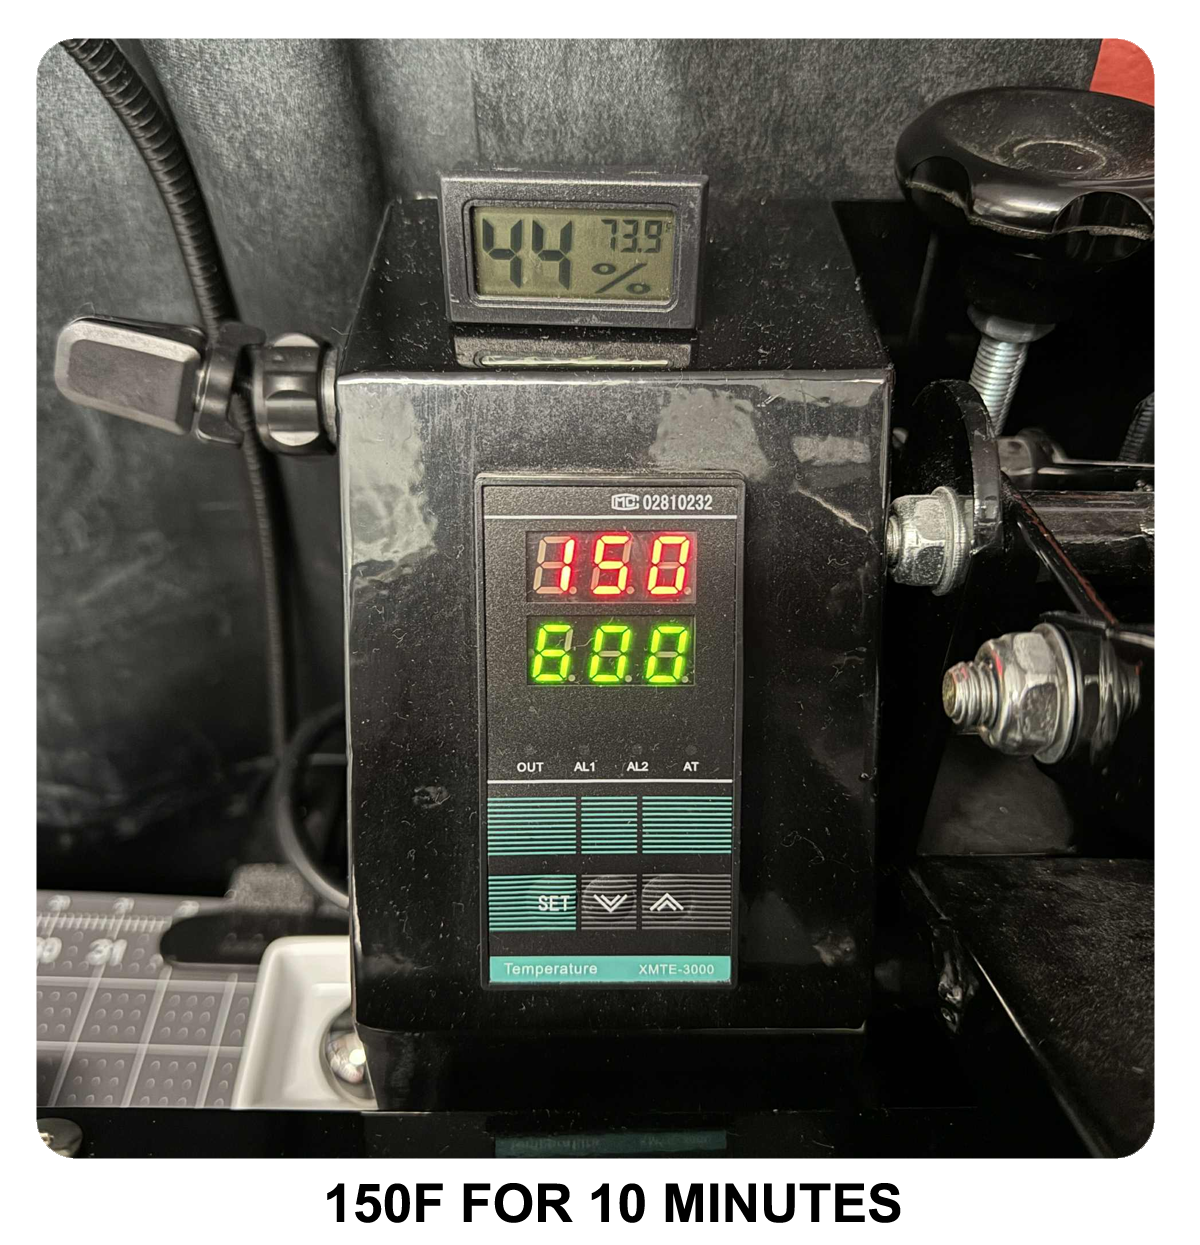
4. Preheat machine to the recommended temperature
and time duration as outlined in the Basic Press Method stacking
formula. 150F for 10 minutes.
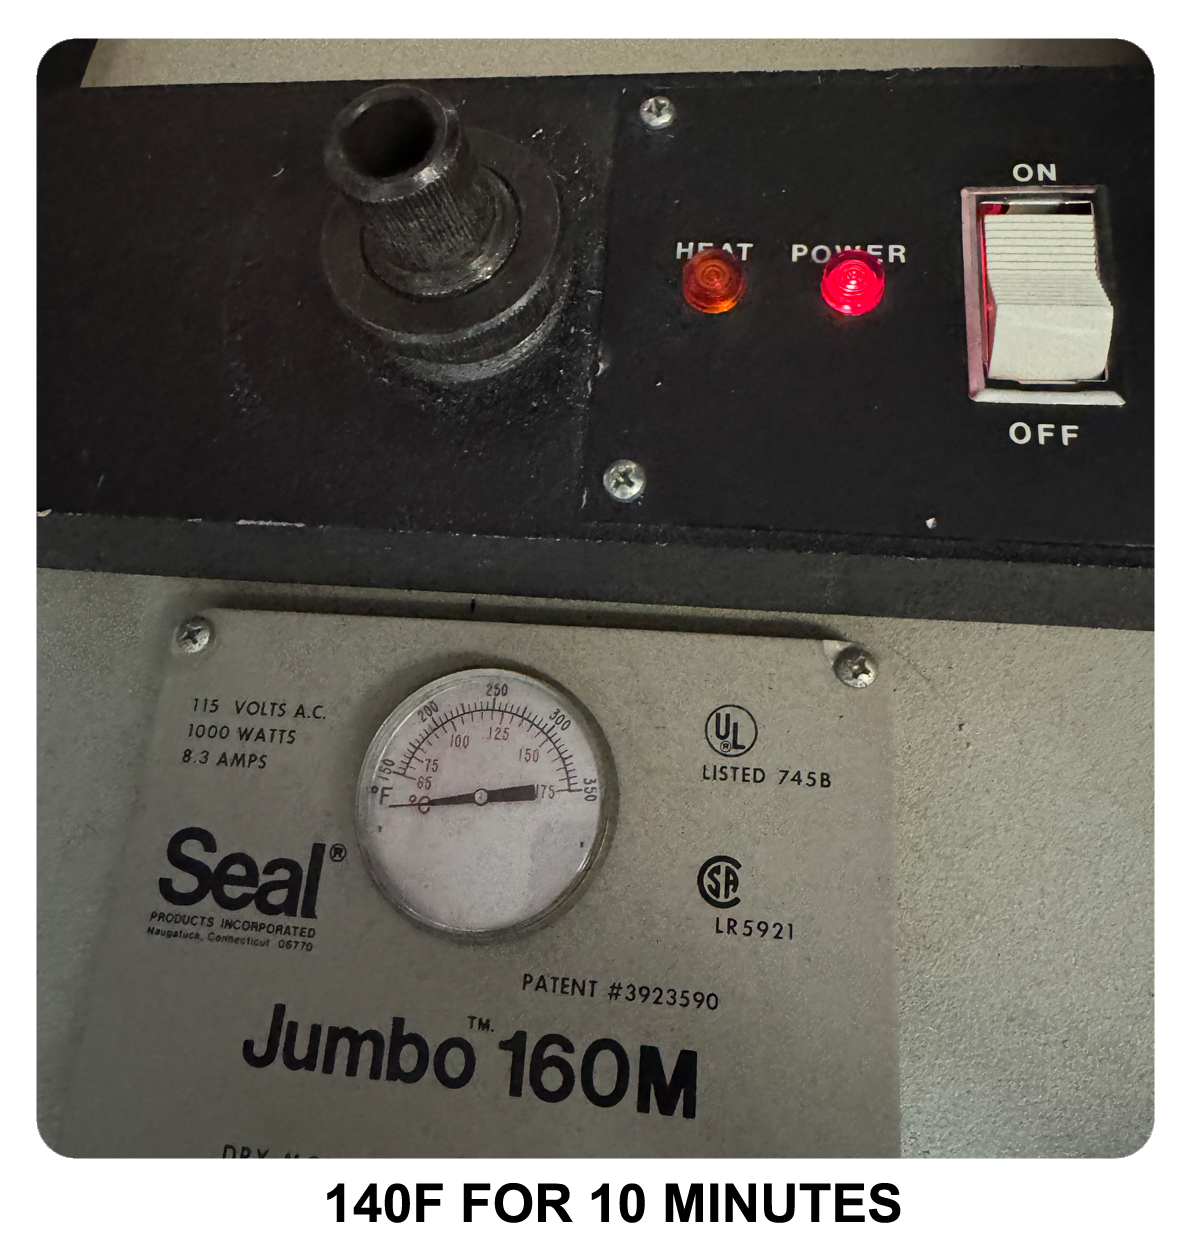
5. Dry mount laminating press machines should set the temperature
to 10 degrees cooler than recommended due
to slower warmup and cooldown times, which equals longer heat.
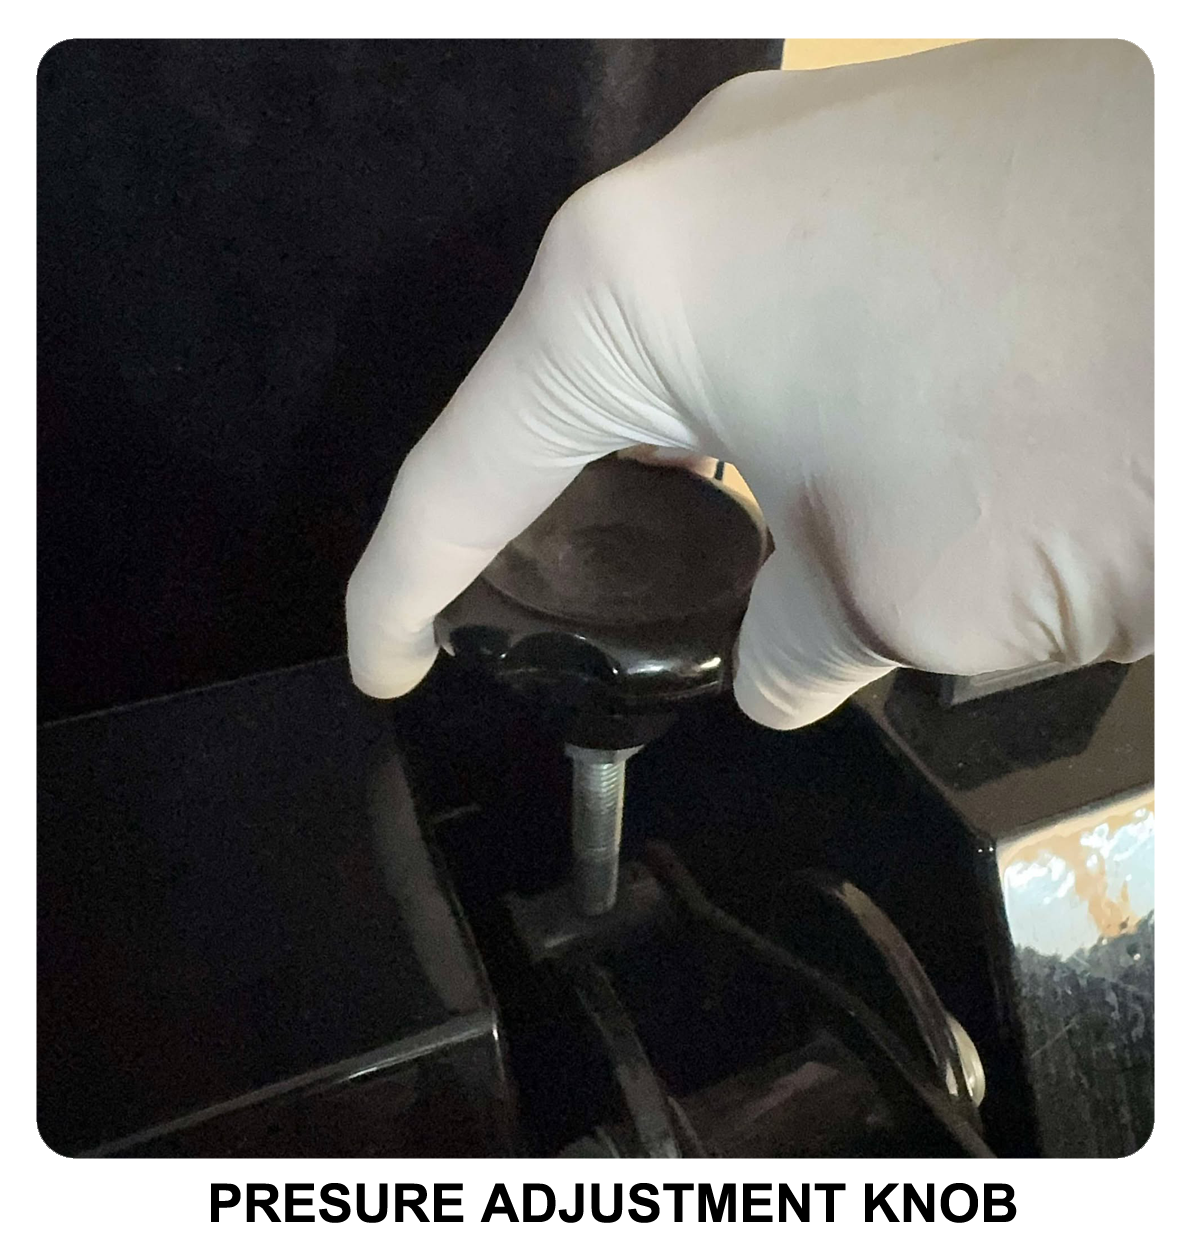
6. Turn pressure adjustment knob and measure
gap thickness for spine of book. The pressure adjustment knob
for swing arm machine is located at the top center of unit.
For clamshell and swing arm machines, turning the knob clockwise
increases pressure. For dry mount laminating press machines,
there will be two knobs. The larger knob must be loosened
first before adjusting pressure with smaller knob. The smaller
knob must be turned counter-clockwise to increase pressure,
which is the opposite of the two other machines.
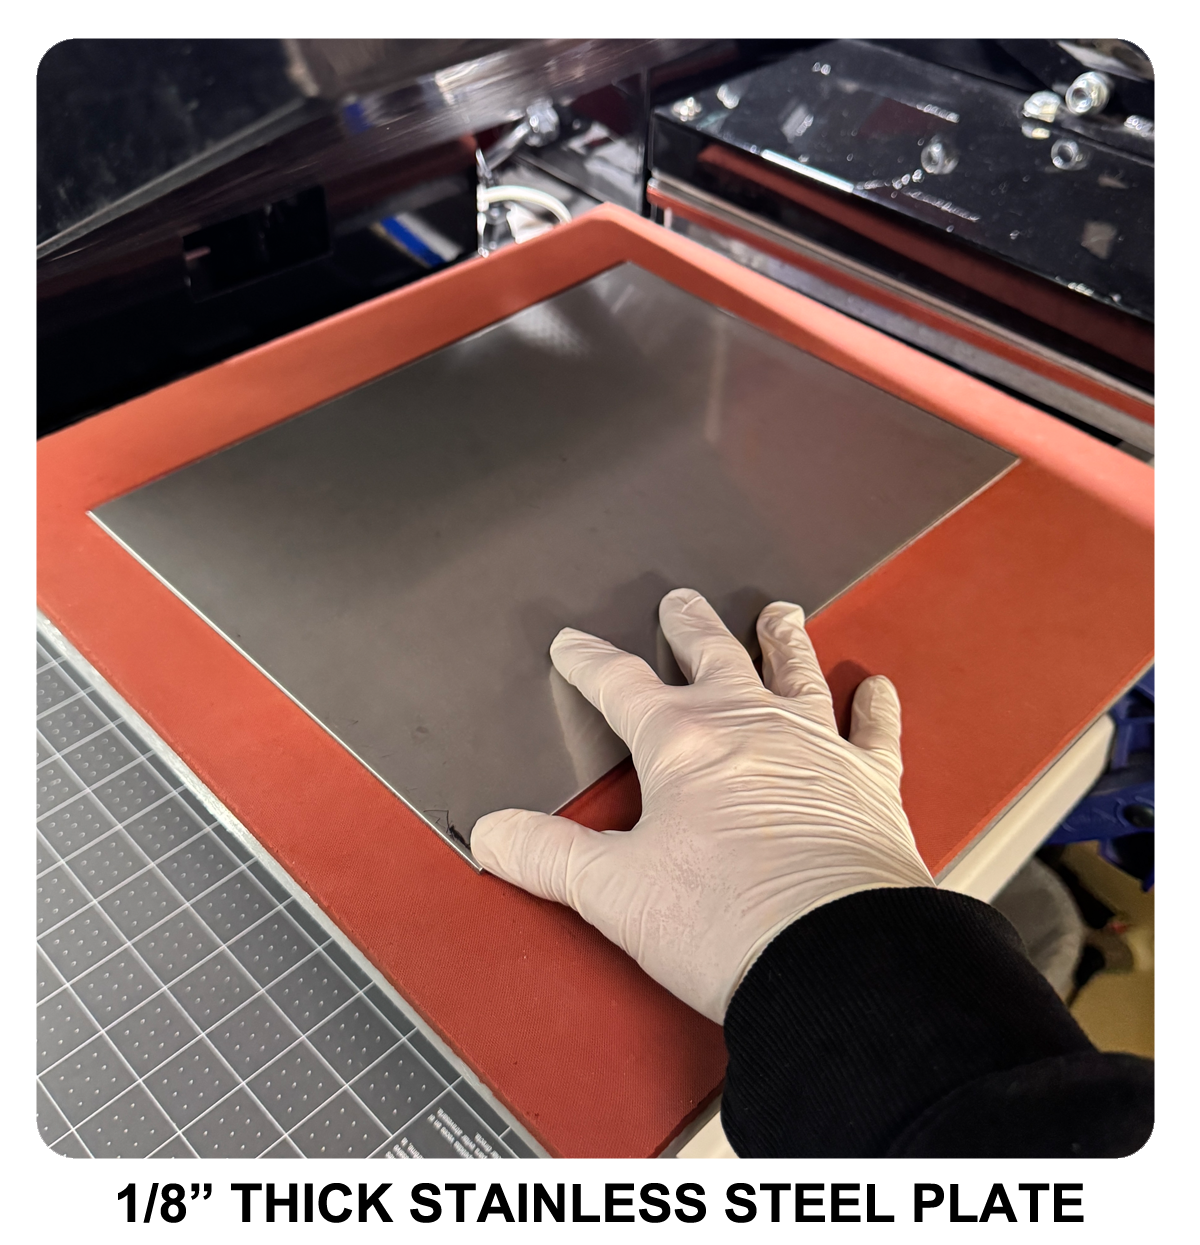
7. Place bottom steel plate on silicone mat
of press machine. Plates should always be galvanized, stainless-steel,
or aluminum to prevent rust. Sizes can be 15x15, 12x10, 9x12
or 8x11.
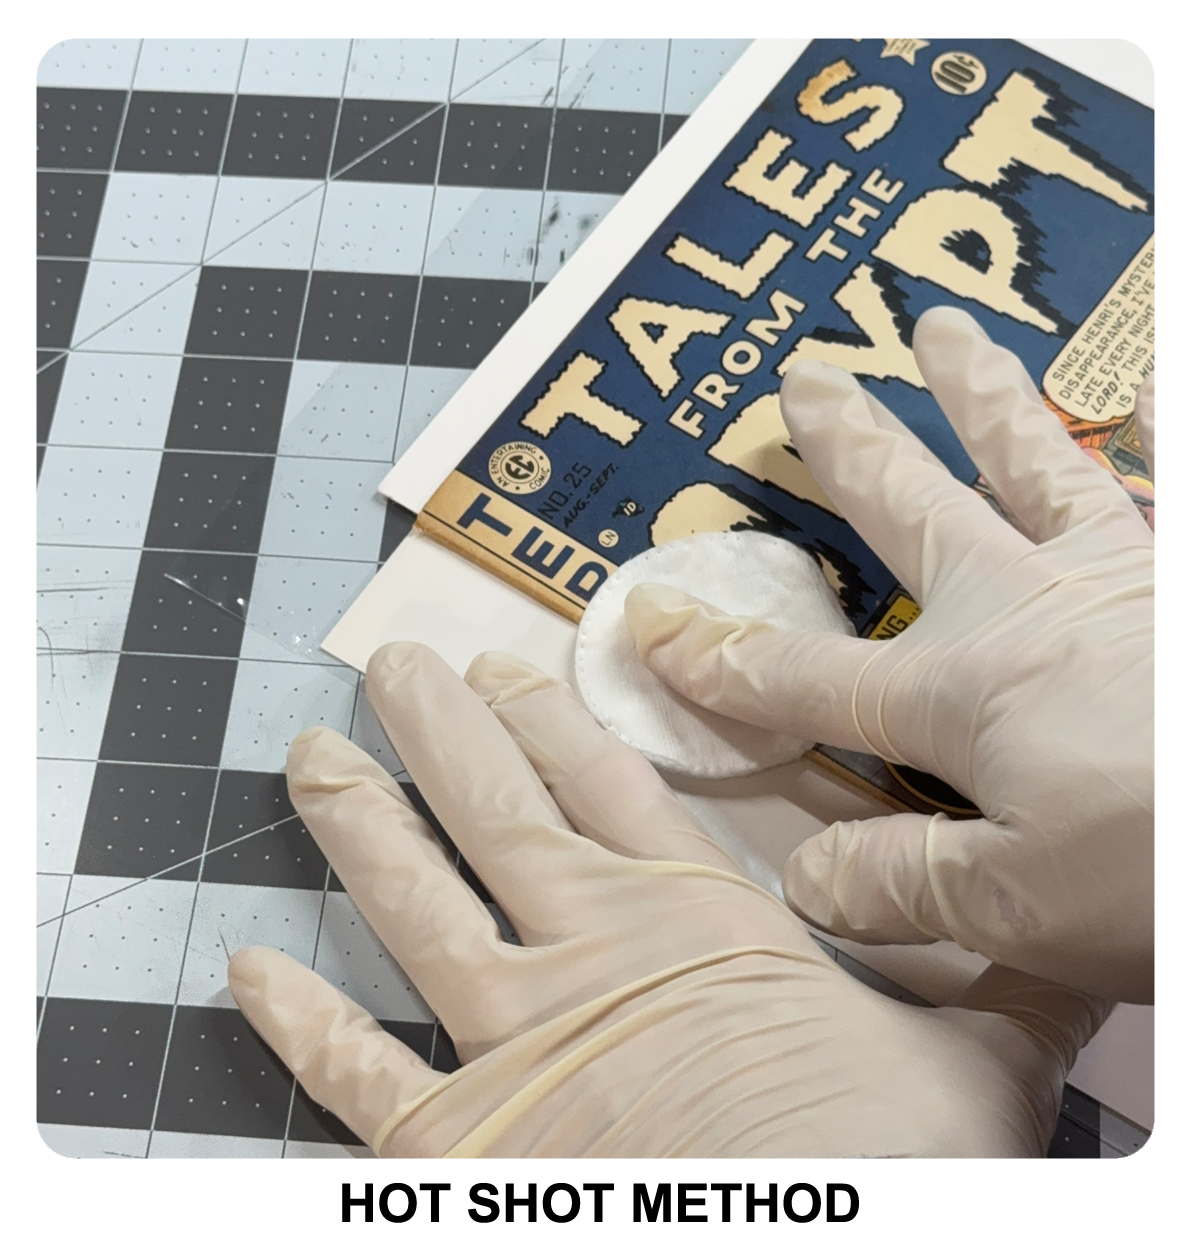
8. For books printed from 1940-2001 with flat matte interior
pages that feature heavy deep denting or deep indentations
to covers, proceed with Hot Shot method (a
damp cotton round, squeezed out between 2 dry cotton rounds)
on any localized areas that require additional humidity. No
Hot Shots to any book with thin glossy interior pages. Only
light steam should be applied using a Cut Out backer board
to modern books with glossy thin interior pages.
9. Follow all stacking layer instructions
from the provided free Basic Press stacking formula. If a
comic book has a shredded spine or spine splits greater than
1/8", place the 65lb cardstock paper 2 pages back from
both front and rear cover. If there are any inserts present,
place a sheet of 65 lb cardstock before and after each insert
page. If there is a Mark Jeweler Insert with an adhesive backing
strip for the mailer envelope, place a sheet of clean SRP
Paper after the bottom centerfold backer board closest to
the insert page.
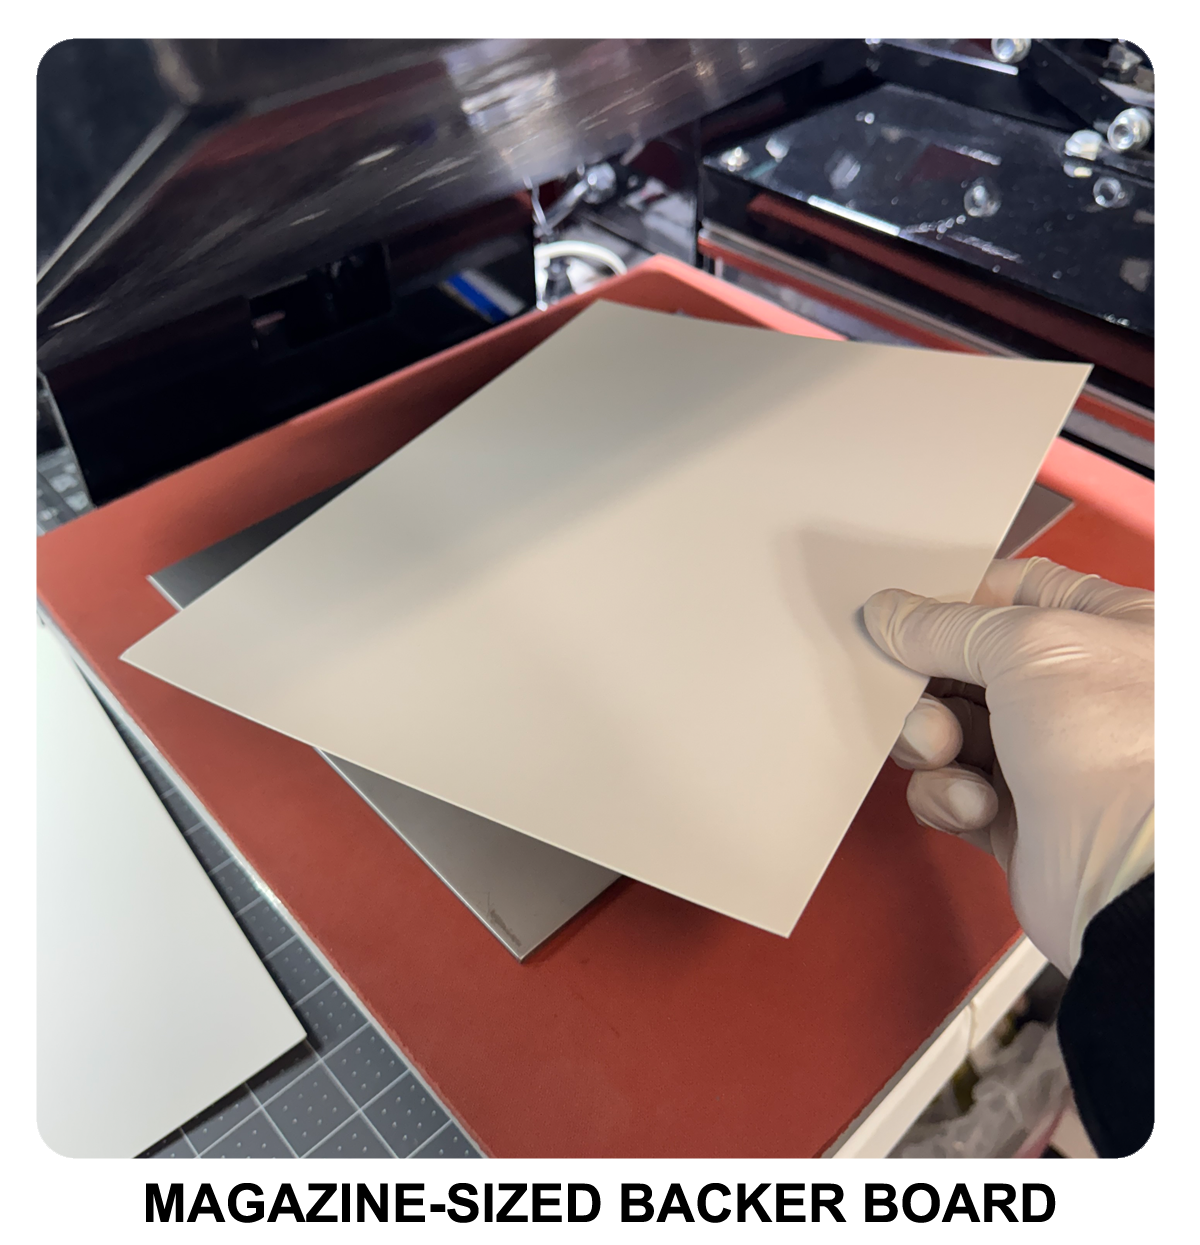
10. Place bottom magazine sized backer board
exterior layer on bottom steel plate.
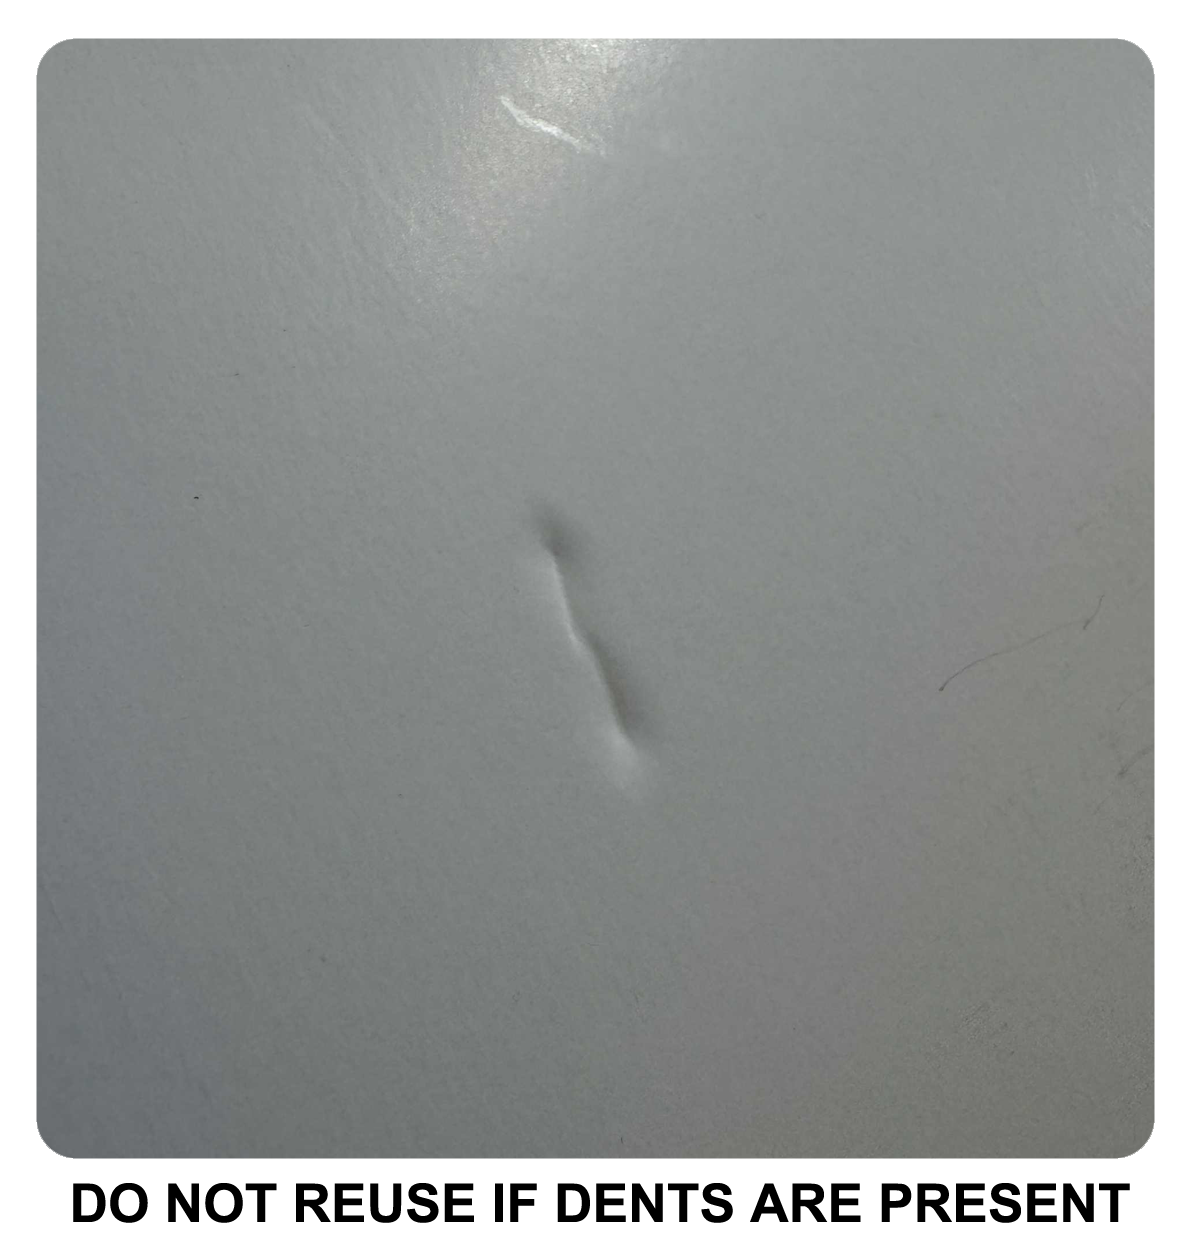
11. Do not reuse backer boards with creases,
staple dents, or dents present. Never reuse copy paper or
cardstock paper. Backer boards may be reused, but only if
there are no dents or warping present.
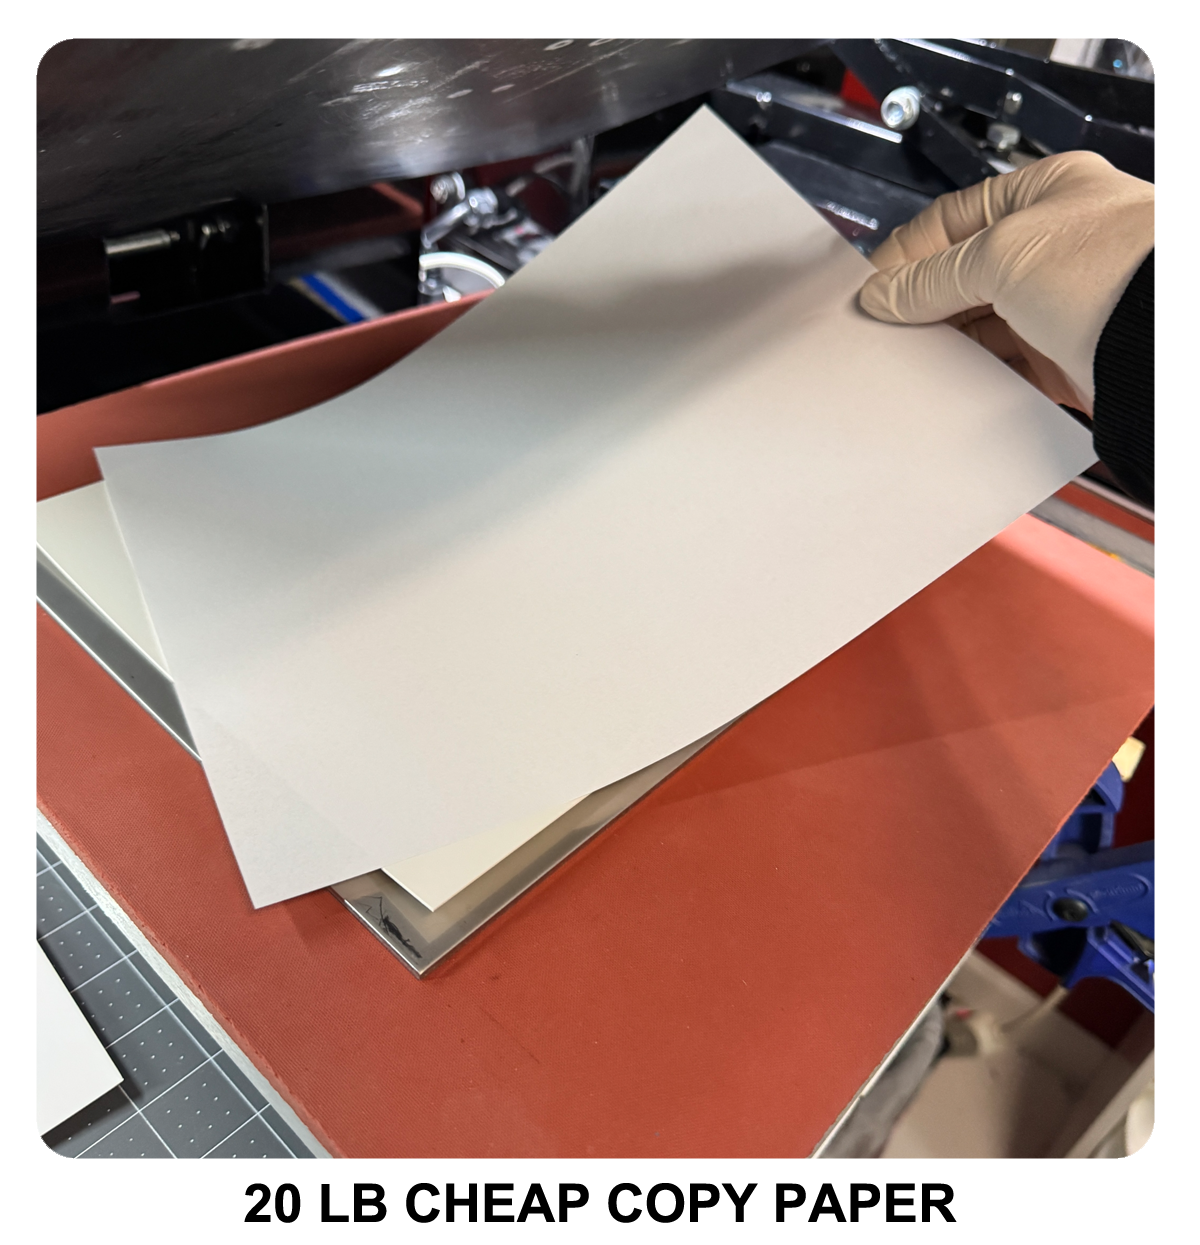
12. Place a sheet of cheap 20 lb copy paper
on bottom backer board. The cheaper the brand, the better.
Many premium high quality brands have now started to use OBA
(Optical Brightening Agents) to their paper stock, which can
cause a film or transference of these chemicals to comic books
when damp or wet. We currently recommend Amazon Basics brand
copy paper.
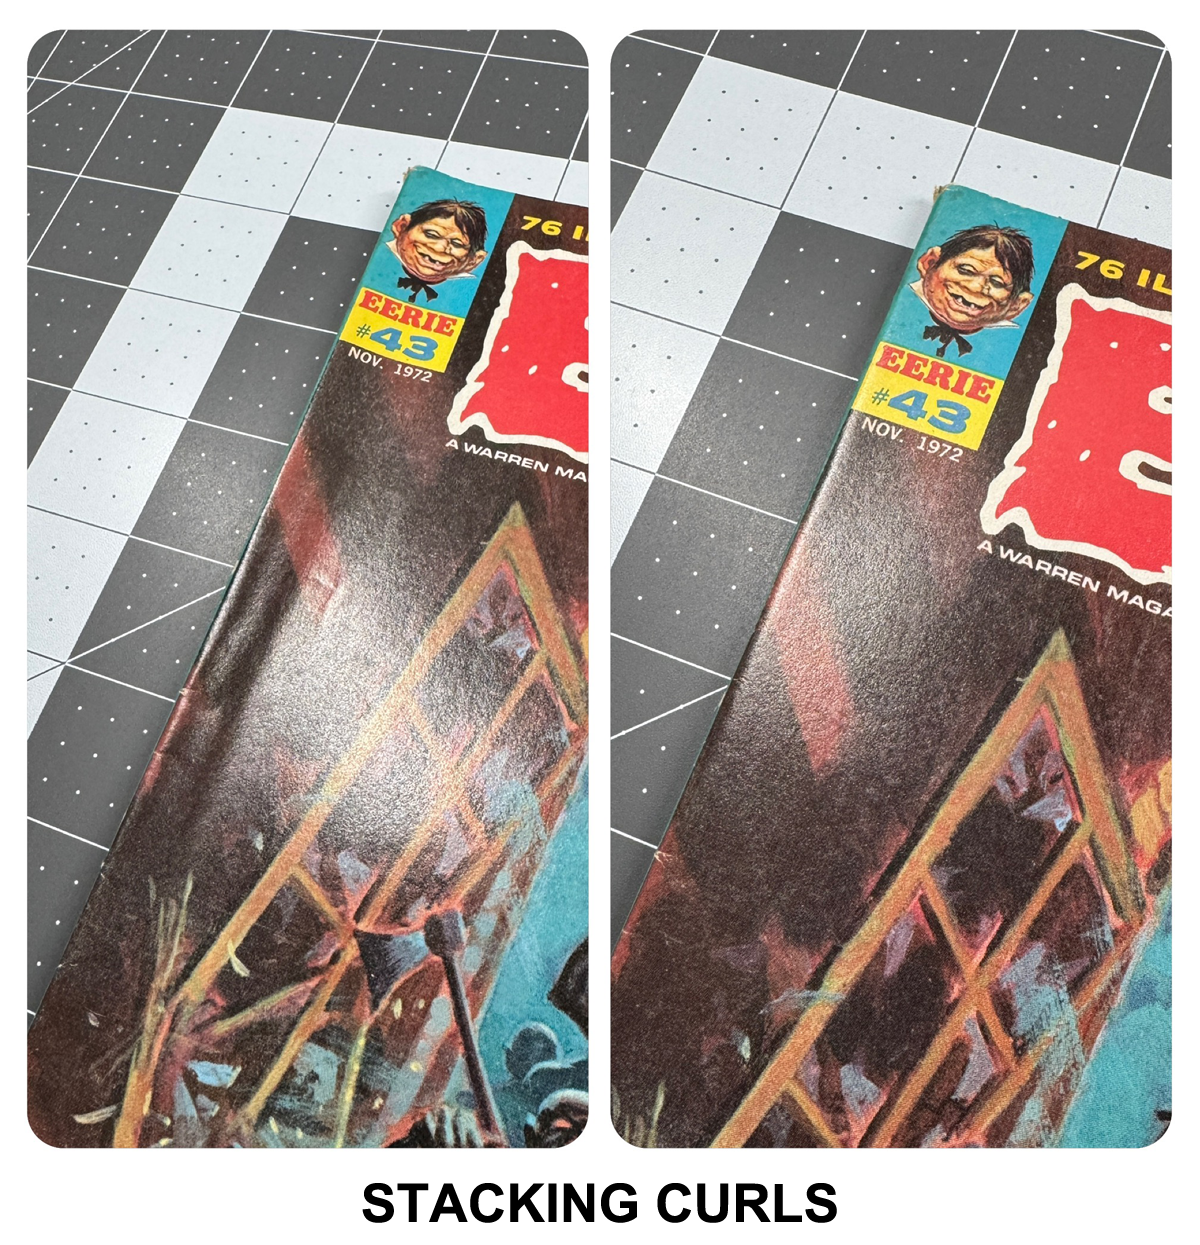
13. Special Instructions: If you are pressing
a book with a stacking curl, or over 32 pages long, or a squarebound,
place book with the most defects facing down first because
you will flip the book and repeat the heat cycle to the other
side after Step #20. Stacking curls should start with the
bend facing up on the first press before the flip.
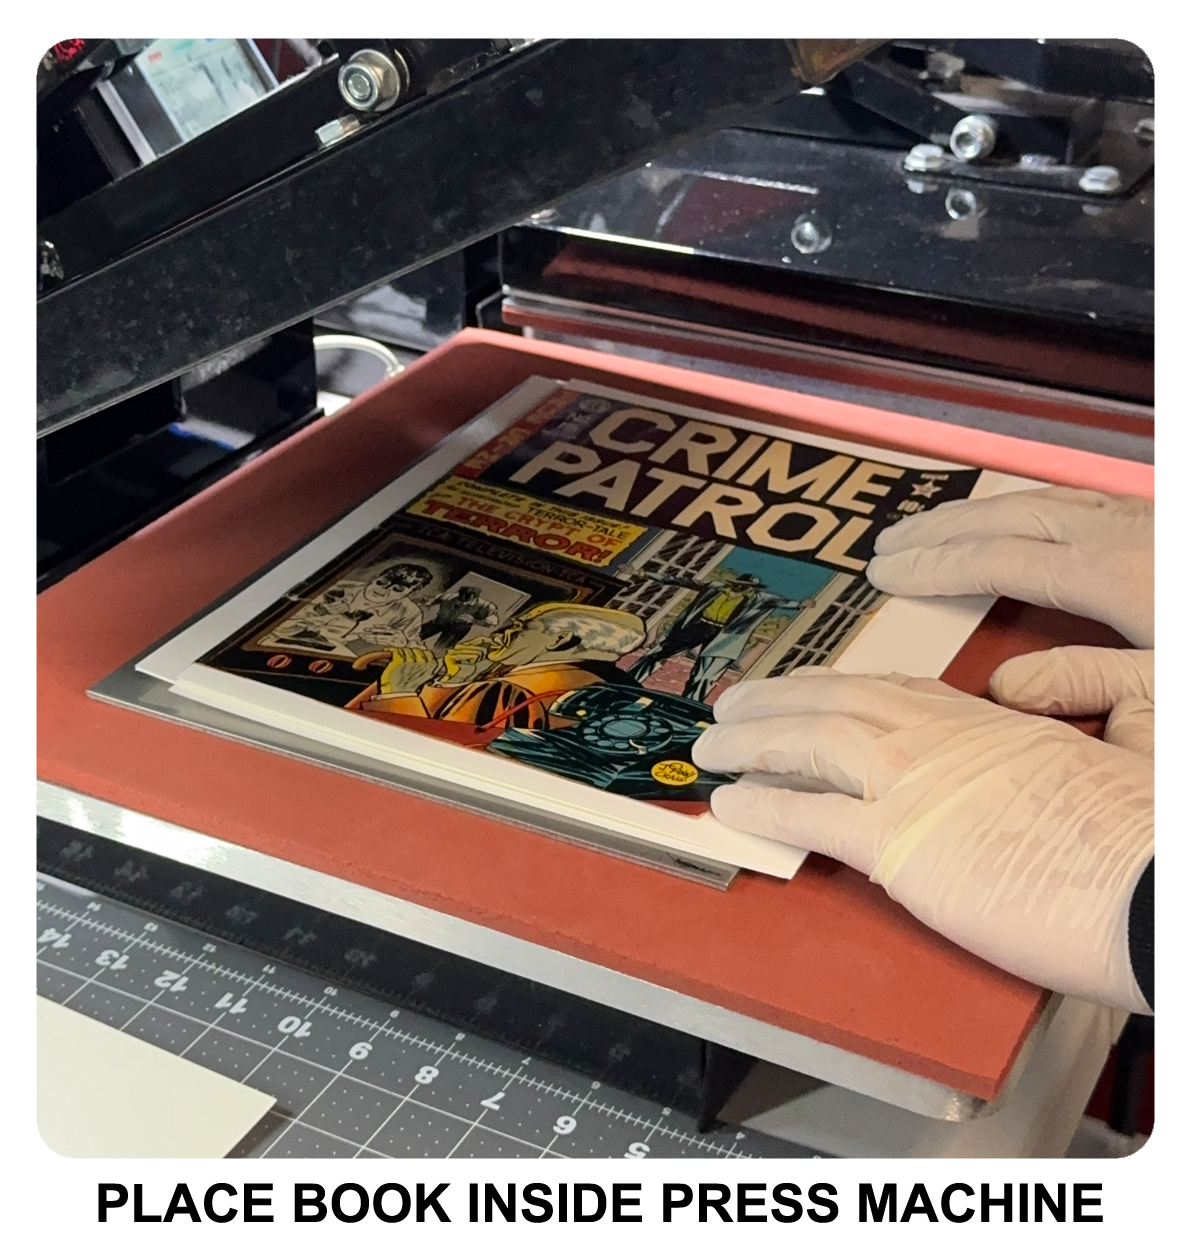
14. Place book with stacking layers in press
machine. Spines should be positioned parallel to hinge or
arm of machine. Book stack should be centered on plate.
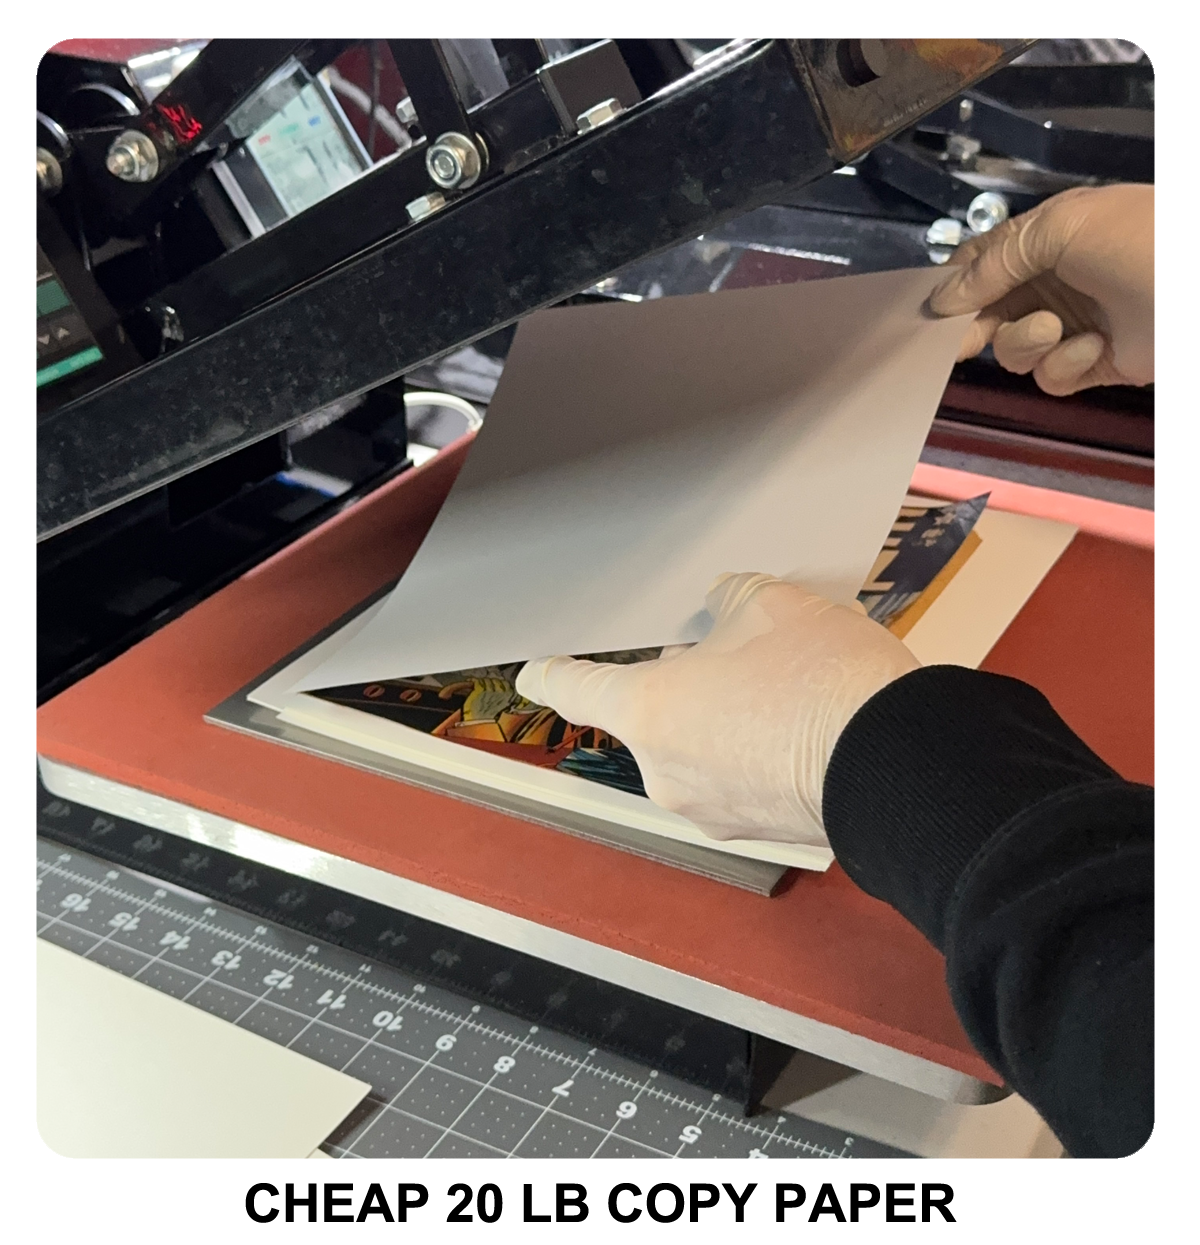
15. Place top sheet of 20 lb copy paper on
top of placed book with stacking layers.
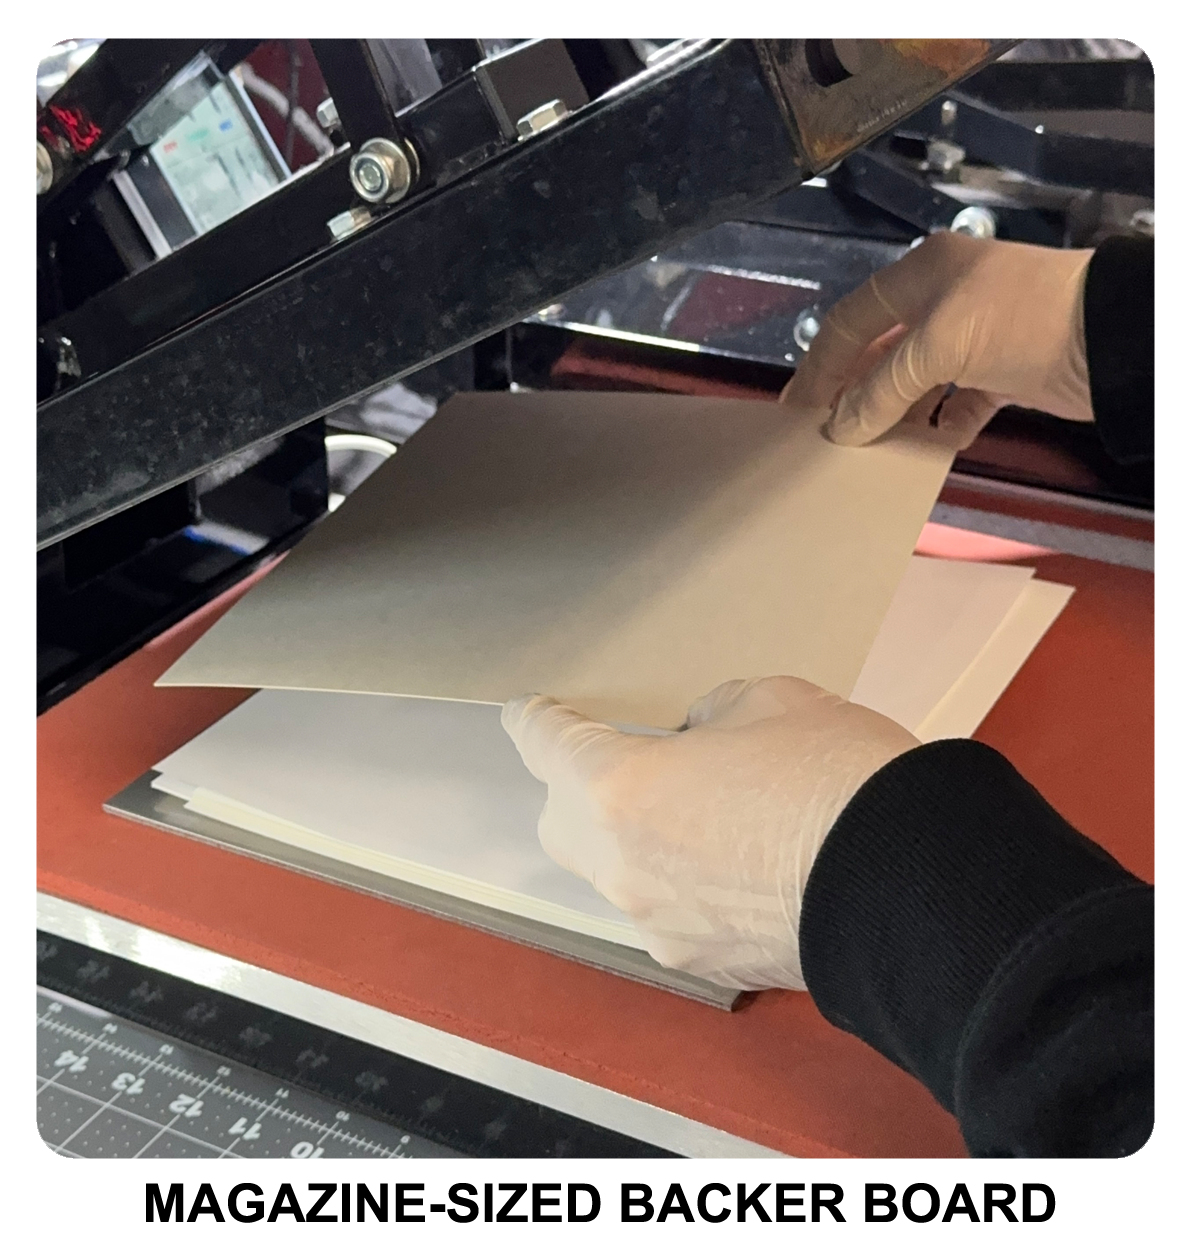
16. Place top magazine sized backer board exterior
layer on top of copy paper layer.
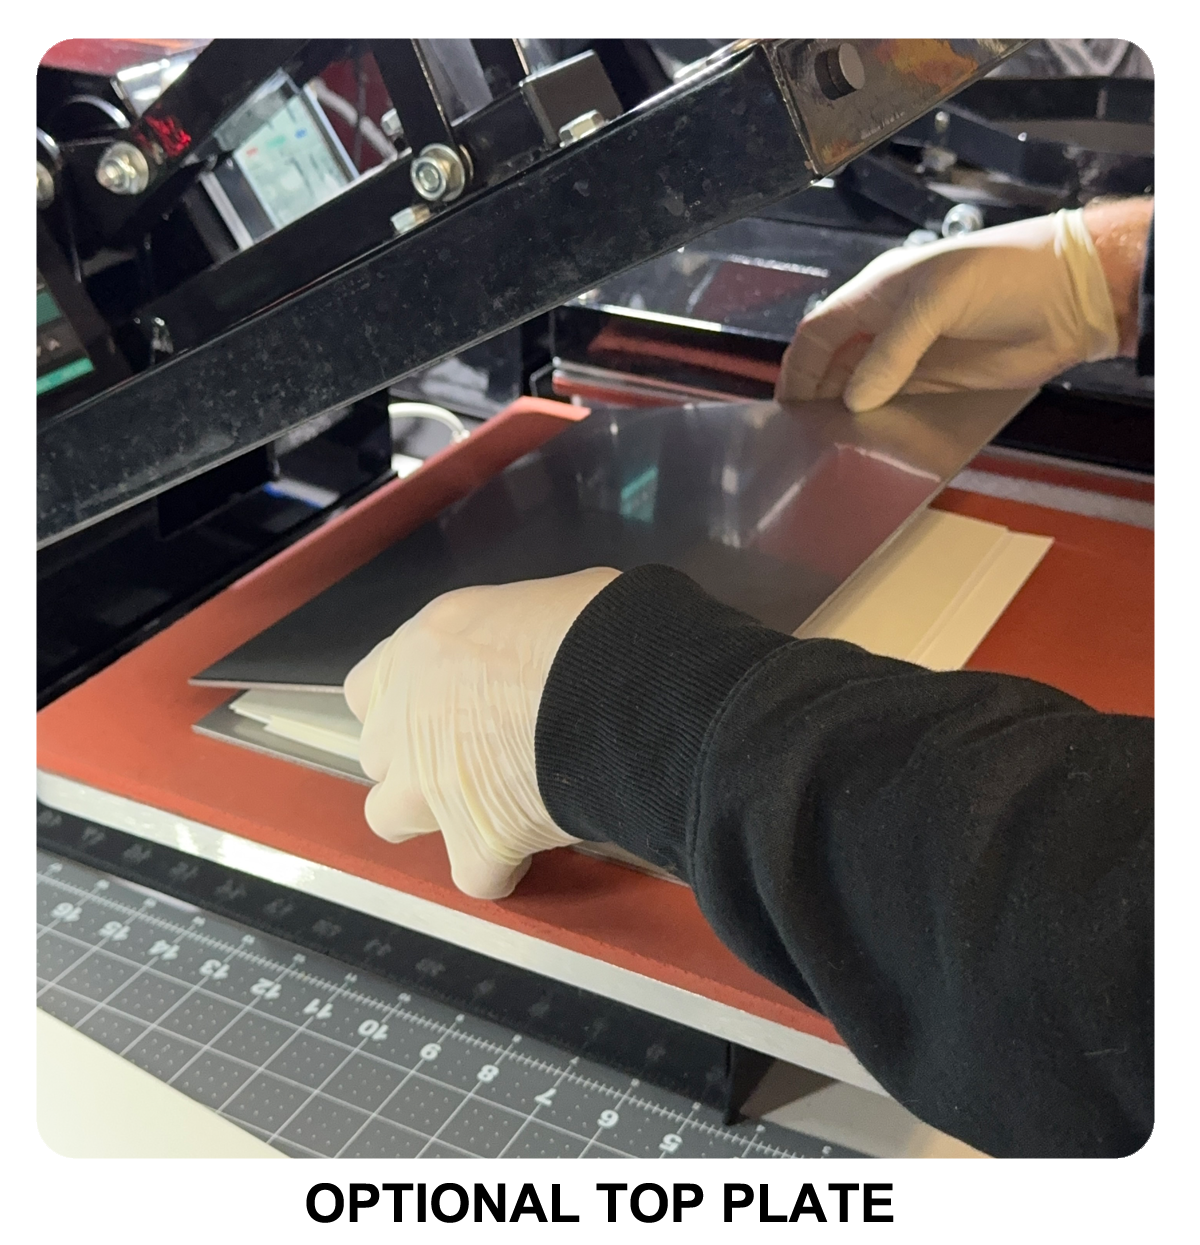
17. Place optional top plate on top of top
exterior backer board, if you use one. I personally use a
top plate to help keep all the stacking layers in place. Others
find the top plate redundant.
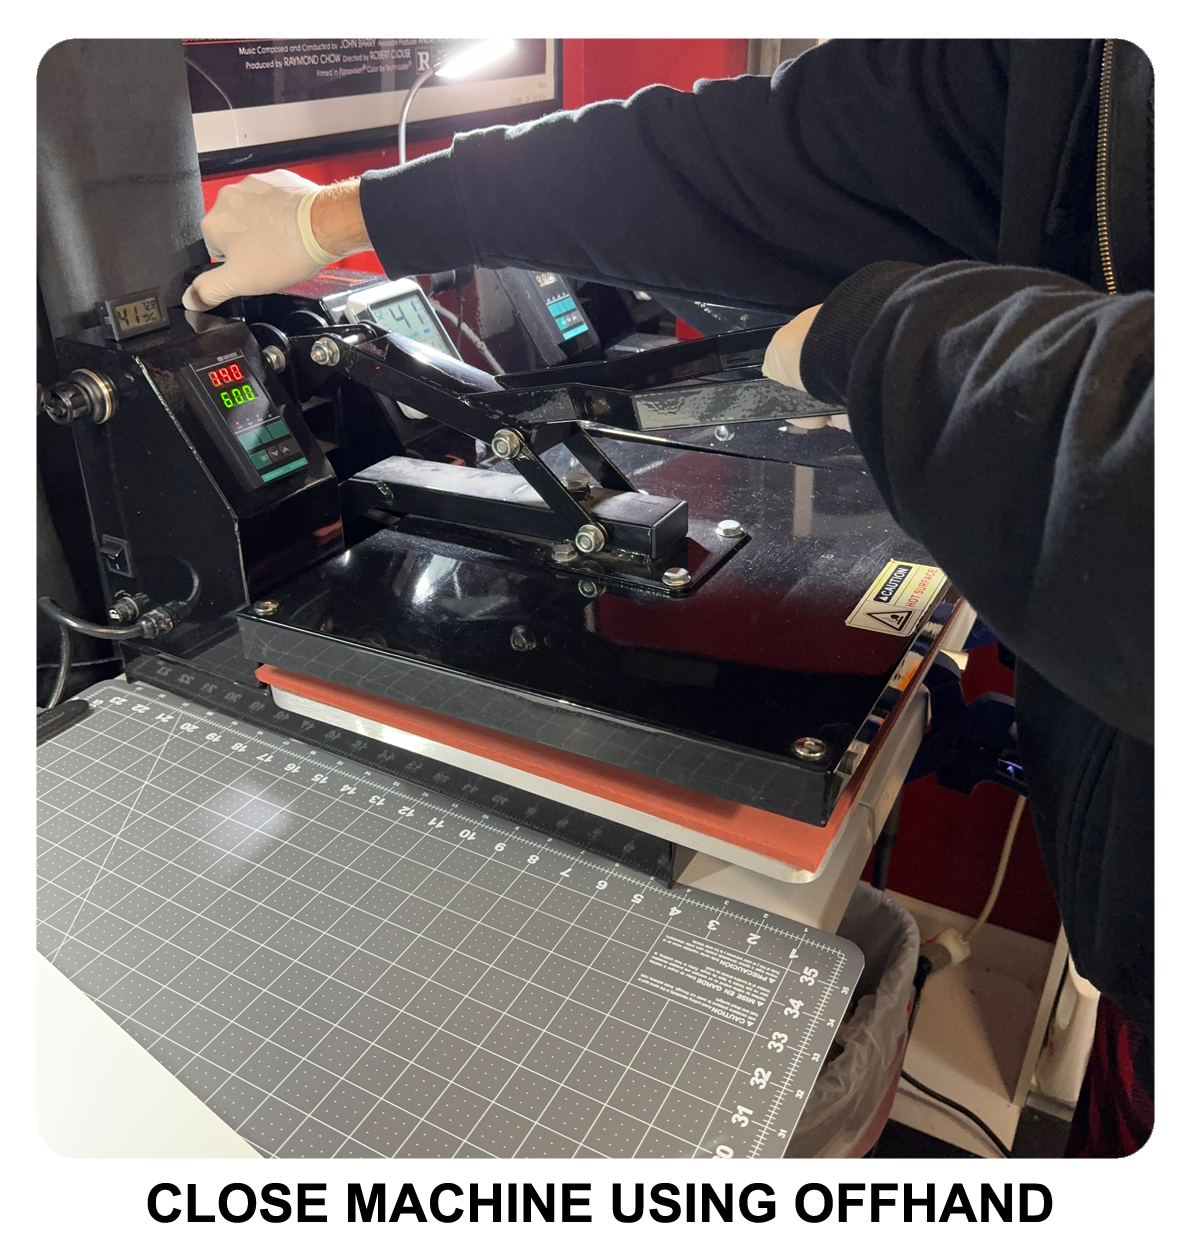
18. Adjust pressure with your main hand if
needed. Close press machine using off hand.
This ensures that you don't accidently close the press machine
using too much force and pressure. If you cannot close the
machine using your off hand, you are using too much
pressure.
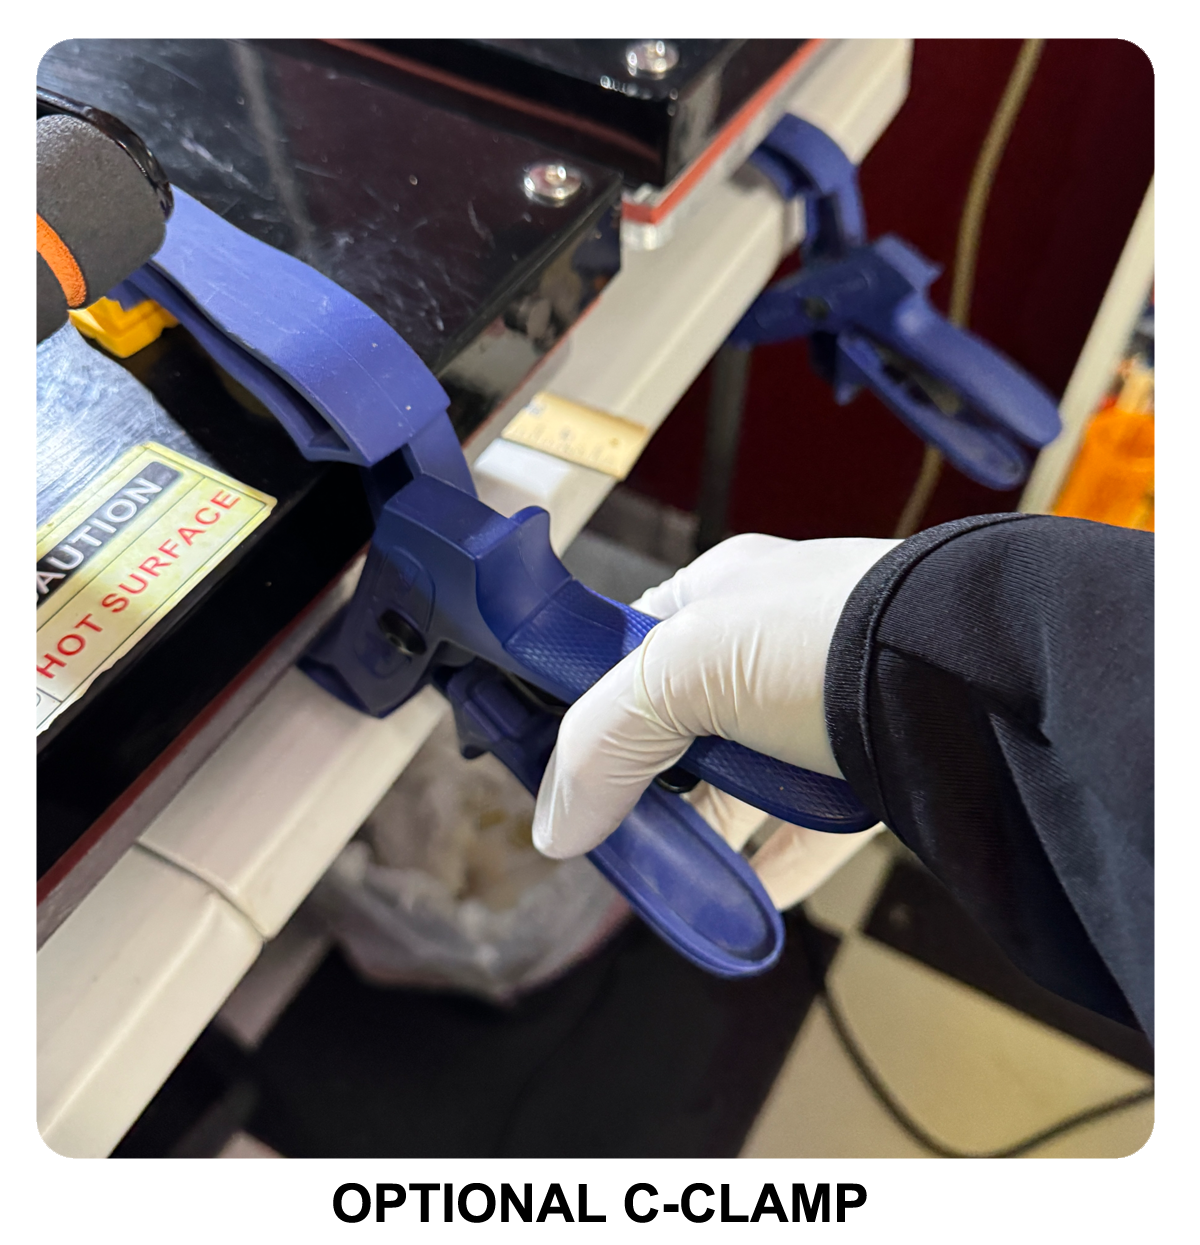
19. Use an optional C-Clamp on the front
edge of clamshell press machine if you have one. Using a C-Clamp
will help make the downward pressure more centralized as opposed
to being from the inside of hinge.
20. Leave heat cycle ON. Wait for the recommended duration
of the heat cycle to complete.
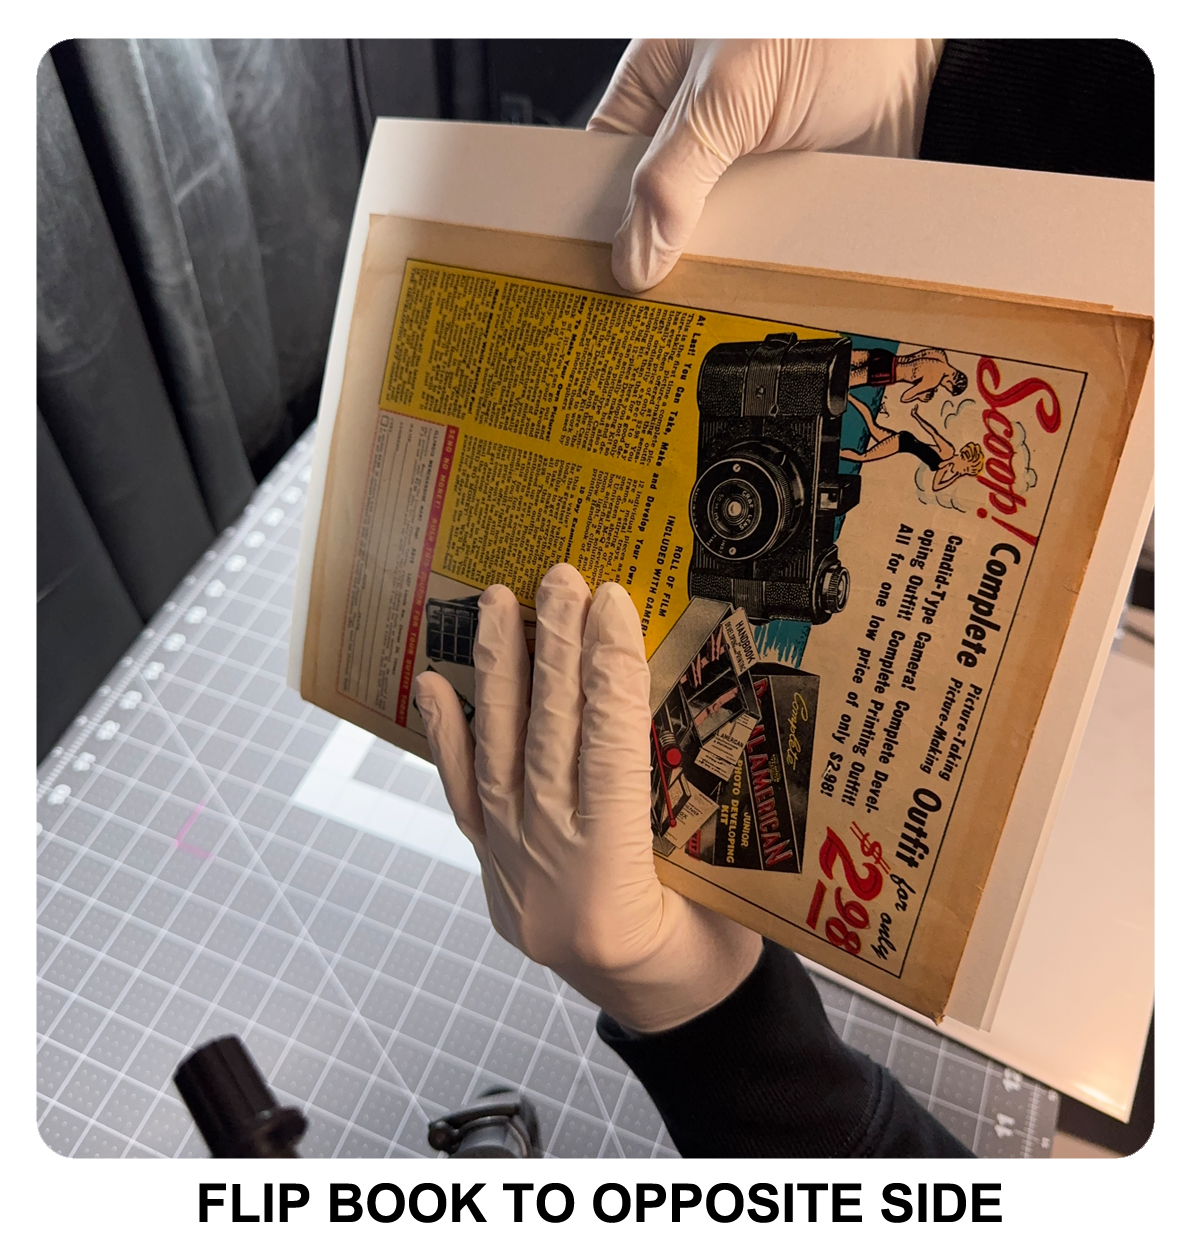
21. Special Instructions: For thick books
over 32 pages, squarebounds, giant size, or stacking curls,
flip book to opposite side with the most
defects facing up and repeat steps #3 - #20. You would also
flip a book if there are a ton of defects present on both
sides. If none of these conditions apply, leave the regular
sized 32 page comic book inside press machine and
do not flip.
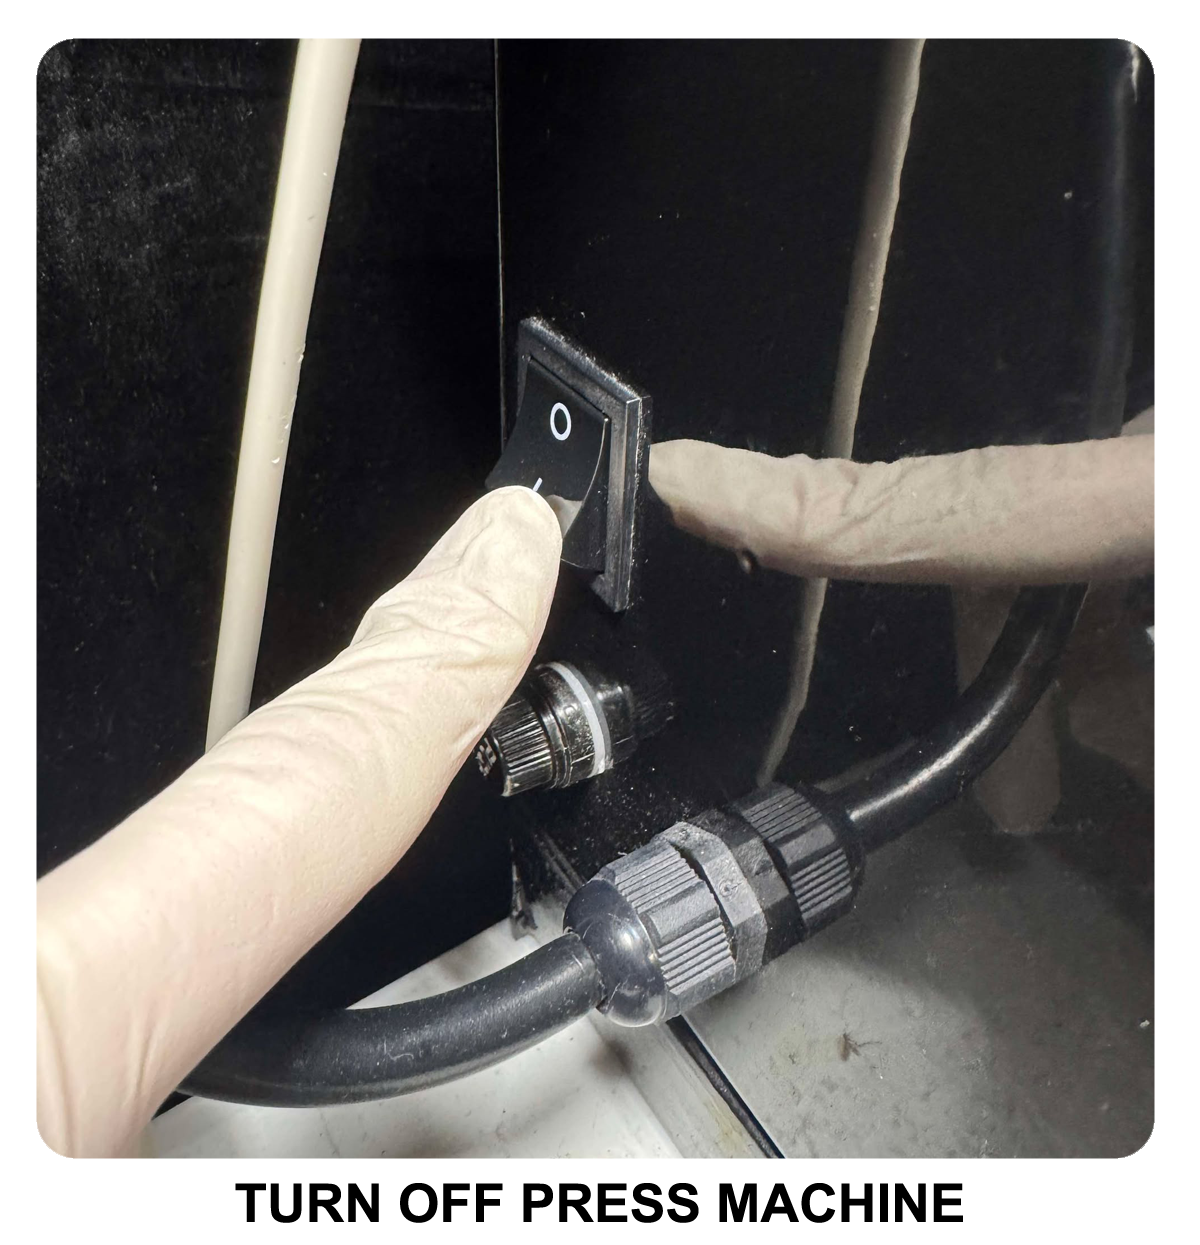
22. Once the heat cycle is complete, turn OFF press
machine. Do not open press machine right now. There
must be a proper cool-down period or defects are guaranteed
to return (reversion).
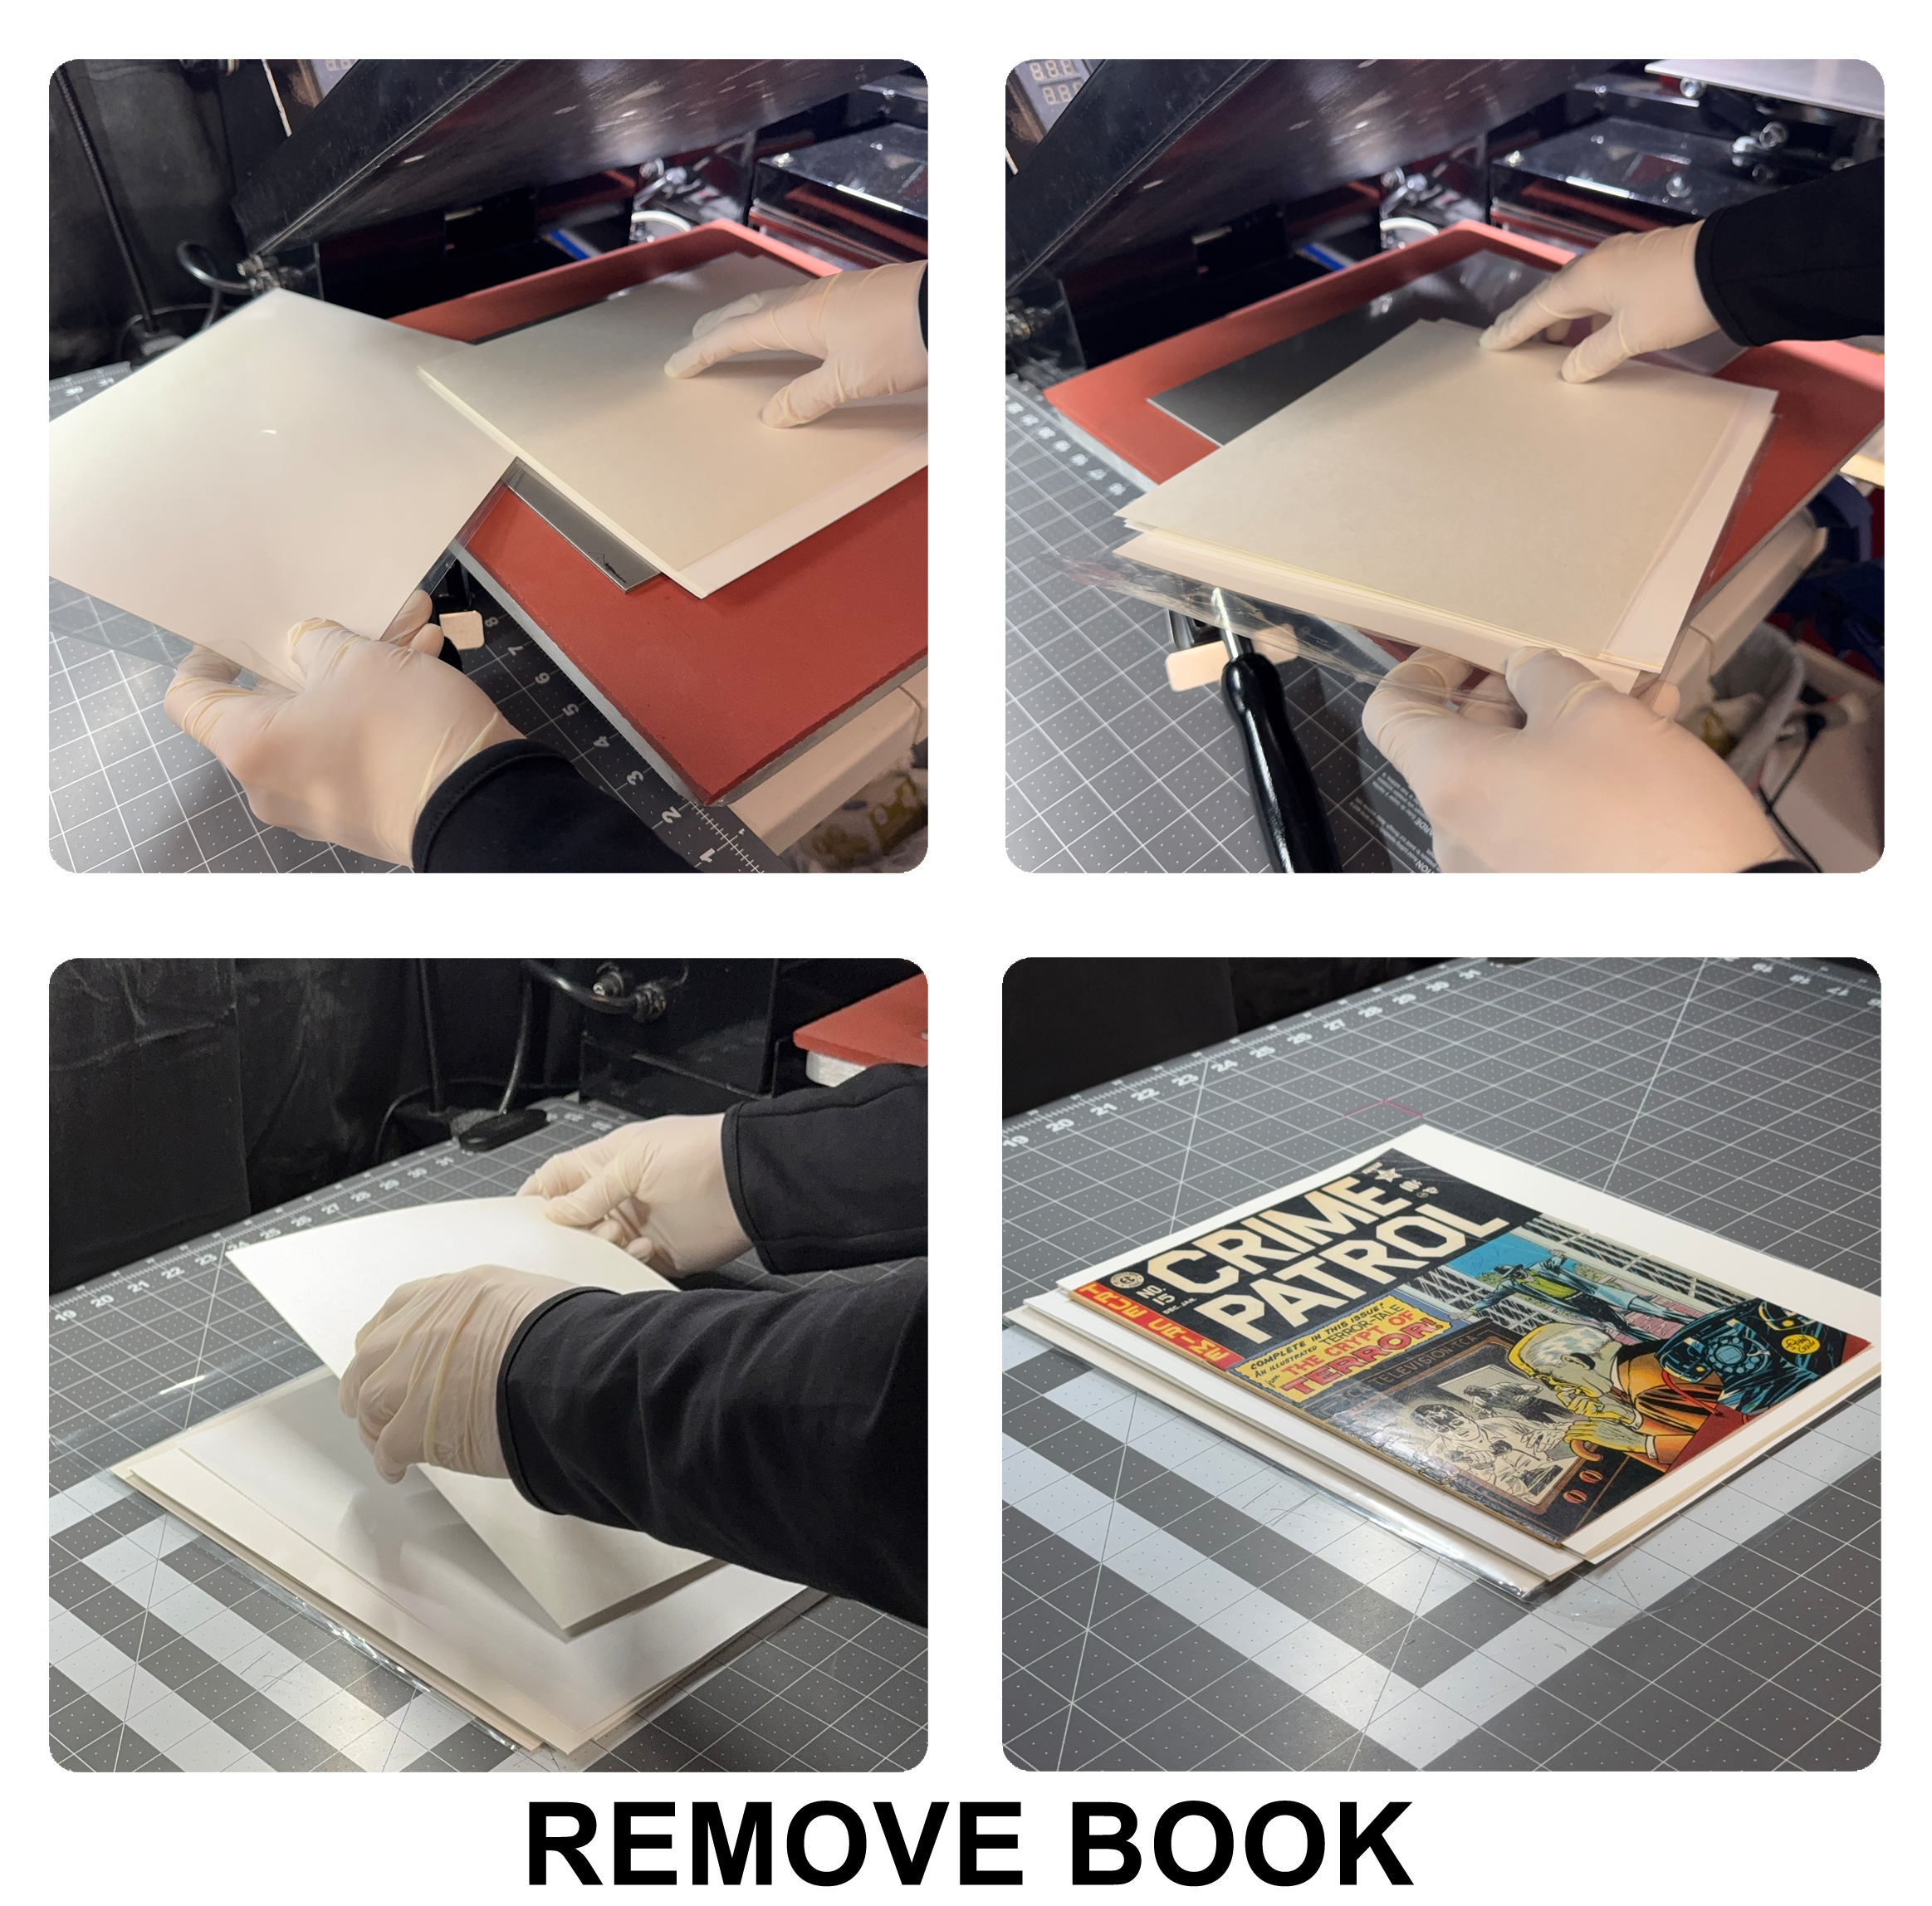
23. For vintage comic books and magazines with flat matte
interior pages, wait 18-24 hours before removing
book from press machine. For all books with thin glossy magazine
style interior pages, wait 2-4 hours before
removing book from press machine. Waiting is equally important
as the press itself in order to produce the best results.
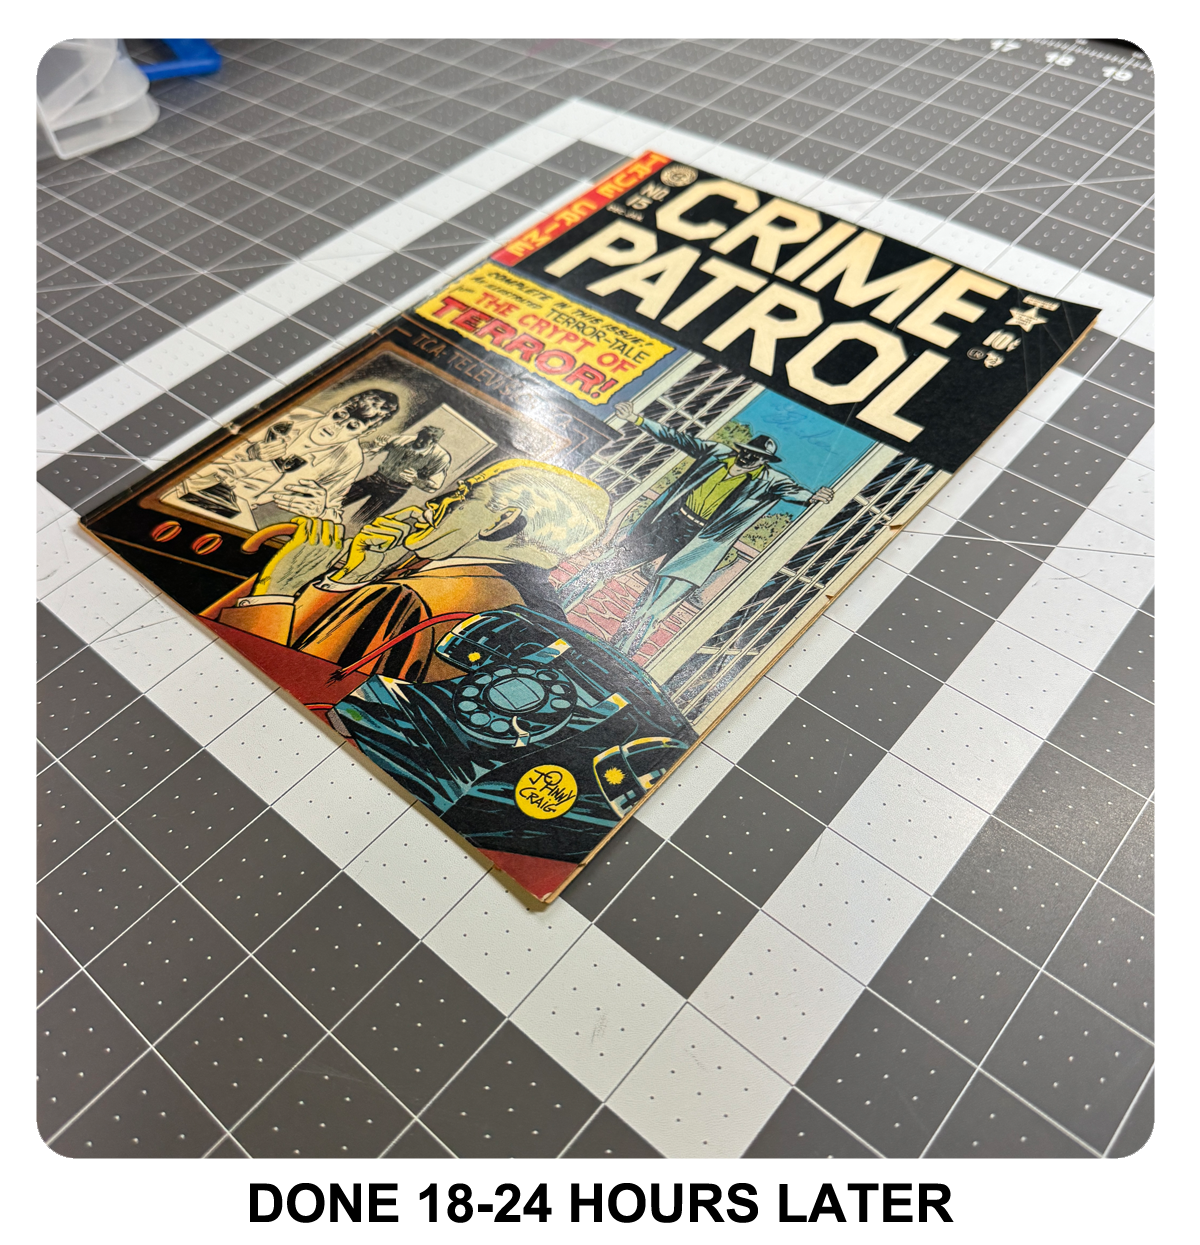
24. Books are typically done the next day.
Keep pressed books in the same room as the pressing room environment
for at least 5-7 days. Perform a reversion inspection check
and take new photos. Compare results. After 7 days, the book
can be safely shipped off to a third-party grading company
or client.
Post-Press Storage Guidelines
After pressing, the paper fibers of a comic are in a “reset”
state. They’ve been relaxed and flattened by heat and pressure,
but they need time in a stable environment to fully settle.
If you rush a book straight to grading or toss it back into
an unstable storage space, you risk defects slowly returning.
Here’s what we recommend:
• Cooling/Settling Period: Let
your freshly pressed book rest for at least 24–48 hours in
a controlled environment before bagging and boarding. This
allows the paper fibers to stabilize naturally at room conditions.
Some advanced pressers give high-value books a full 3–5 days
before handling or shipping.
• Environment: Keep the
book in a 70–75°F room with 40–50% RH (same as your pressing
setup). Avoid humid basements, hot attics, or rooms with fluctuating
air conditions. Stability is the key to preventing reversion.
• Flat, Supported Storage: Store
the comic flat between clean, dry backing boards (no pressure,
just support) or inside a bag and board with a full-size backer.
Some collectors stack a light, even weight (like another flat
board) on top to encourage the book to stay flat while it
settles.
• Avoid Immediate Shipment: Mailing
right after pressing is risky — comics can be exposed to heat,
humidity, or pressure during transit, which may undo your
work. Waiting a few days before packaging helps the fibers
“remember” their pressed state.
• Longer Holds for Problem Books:
If the comic had severe waves, stacking curls, or stubborn
dents, give it a bit more rest — up to a week — before grading.
Patience here means better long-term results.
General Rule of Thumb:
• Simple press (minor bends/waves):
Wait 2–3 days.
• Heavy press (major ripples/curls):
Wait 5–7 days.
• Always ship in stable climate:
Avoid mailing during extreme hot or humid weather
if possible.
REVERSION AFTER PRESSING
Another important concept is reversion — this happens when
a book looks great right after pressing but slowly begins
to “bounce back” to its previous shape. Reversion is often
caused by pressing in unstable conditions where the temperature
or humidity fluctuates. A consistent environment ensures
that when the fibers are reset during pressing, they stay
that way. Leave all vintage comic books (1930-2001) inside
press machine until the next day before removing. Flaring,
lifting, and wavy pages can develop when a book is removed
too soon or improperly stored. While rare, reversion can
(and does) happen. Review and verify the comic book retained
a good press after 5-7 days. Keep pressed
books in the same pressing room environment. I recommend
this step especially if you are pressing a book for a client,
friend, or a grading company! It is entirely possible to
come back several weeks later - only to find your hard work
performed on the book has reverted back to its previous
state. Some books can be stubborn.
YOUTUBE TUTORIAL
VIDEO PLAYLIST
I recently started some tutorial videos that illustrate different
methods and techniques covered on this page. The videos do
not have audio or sound and are shot with a gopro camera in
1080p. I don't want to be that guy, but they take a really
long time to produce and edit so, "Please give a like
and subscribe" Thanks!

How
to Press Comic Books Playlist by KaptainMyke on Youtube
ADVANCED
PRESSING METHODS
You have read my free guide which covers everything you need
to know in order to get started pressing comics. However,
there are many advanced topics and advanced methods not covered
in this free online guide. What about restoration detection
or how to press squarebound prestige format comics? Comic
Book CPR answers all of those questions and more.
www.comicbookcpr.com.
CGC COMICS
The author is also an authorized and licensed CGC Dealer.
Have peace and mind the advice given on this website will
help you achieve the absolute highest grades possible with
CGC. CGC is the most trusted authority on third party grading
of comic books since 2000.
JOIN US
There is a dedicated Facebook Group called "KaptainMyke
Comic Book Pressing" for anyone to join and contribute
ideas open for discussion. Ask questions about this guide
or show off your own books! Anyone is welcome to join. I firmly
believe the spread of accurate free information will help
us all keep books preserved and conserved. You may find the
Facebook Group at this link here:
https://www.facebook.com/groups/kaptainmykecomicpressing

CONCLUSION
The overall goal of this guide is simple: Press books in a
manner so that others cannot detect the book has been pressed.
Light pressure, not firm or hard pressure. Do not burn the
book, do not pop the staples, and do not spin the books on
surfaces. For temperatures, 150-160 degrees or lower seems
to be the “sweet spot” on most books to play it safe. Pressing
under high heat for less than 5-7 minutes on each side is
good for most books. Keep moisture and humidity to a minimum
on your books. Always keep a timer with you and don’t forget
to set your timer! These steps are some of the things that
can be done to successfully press a comic book, magazine,
or poster with minimal to no damage to the item being pressed.
These tips will hopefully save you money,
and guide you along the way as YOU learn and pick up new ideas
and better ways to accomplish things. I am not a professional
presser, and I’m not a professional grader. However, these
are the methods I use when I press comic books as a hobbyist.
All of this is a learning process. I encourage
you all to share your ideas among everyone so that we can
all prevent damage to one another’s books. I am open to any
feedback and suggestions. I also reside in a coastal Northwestern
state, which is more humid than inland states. Your results
may vary based on humidity and temperature of the climate
you reside in.
Shareable Links:
Thank you!
KaptainMyke
|


